
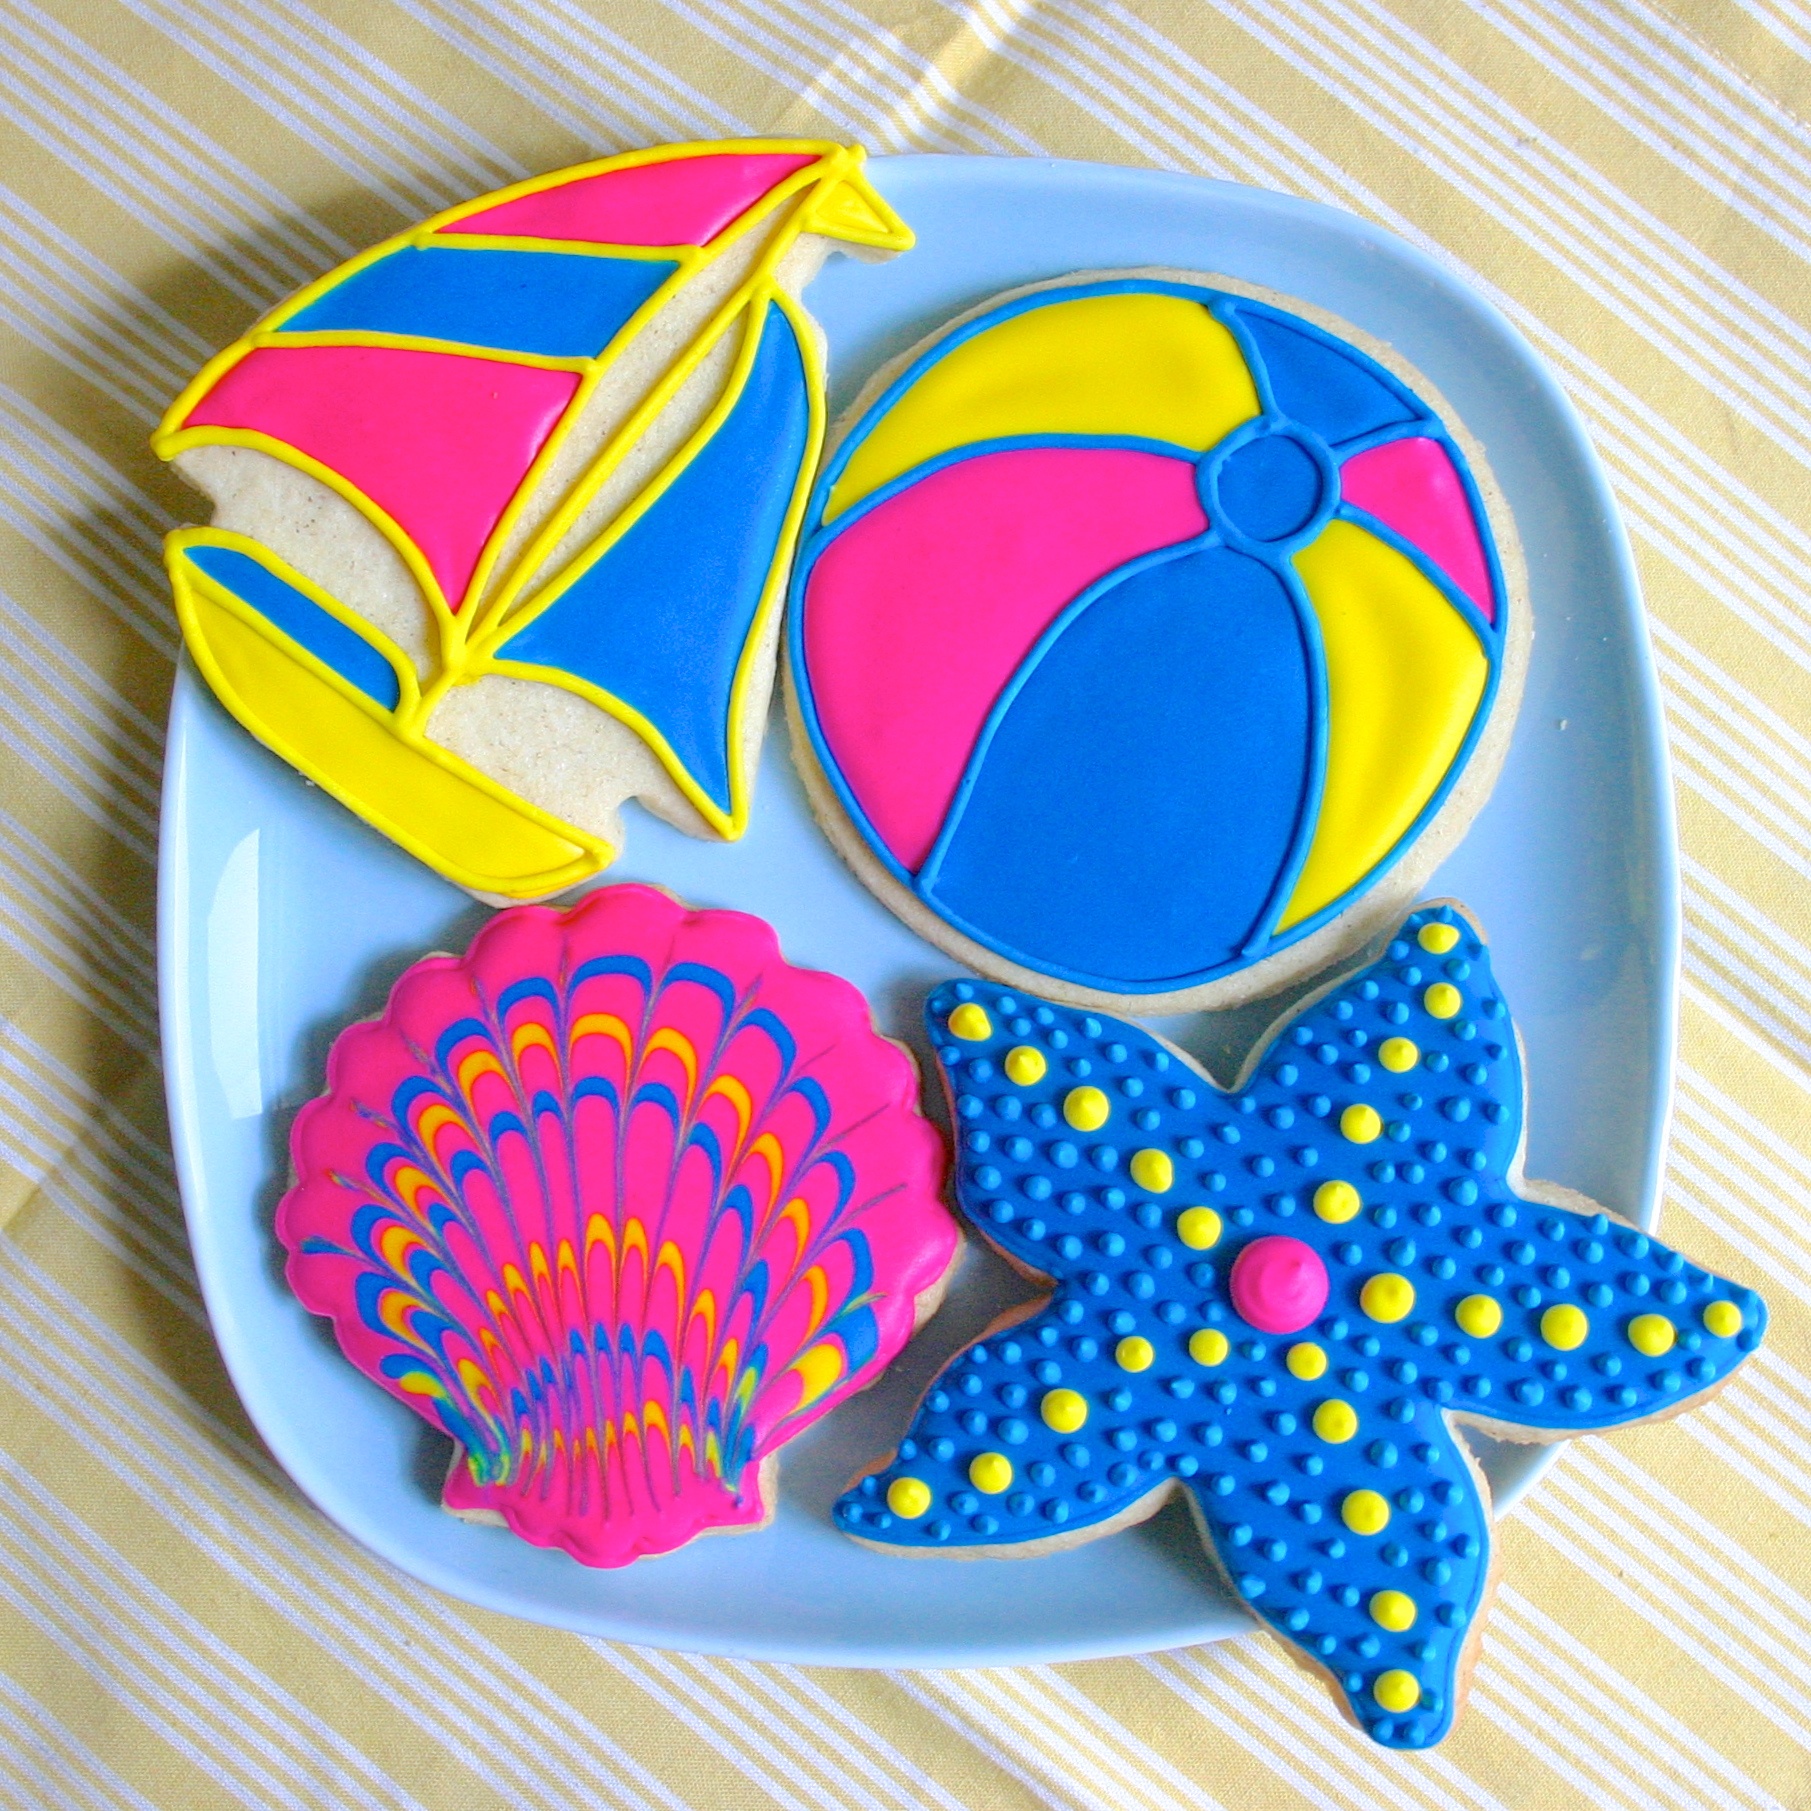
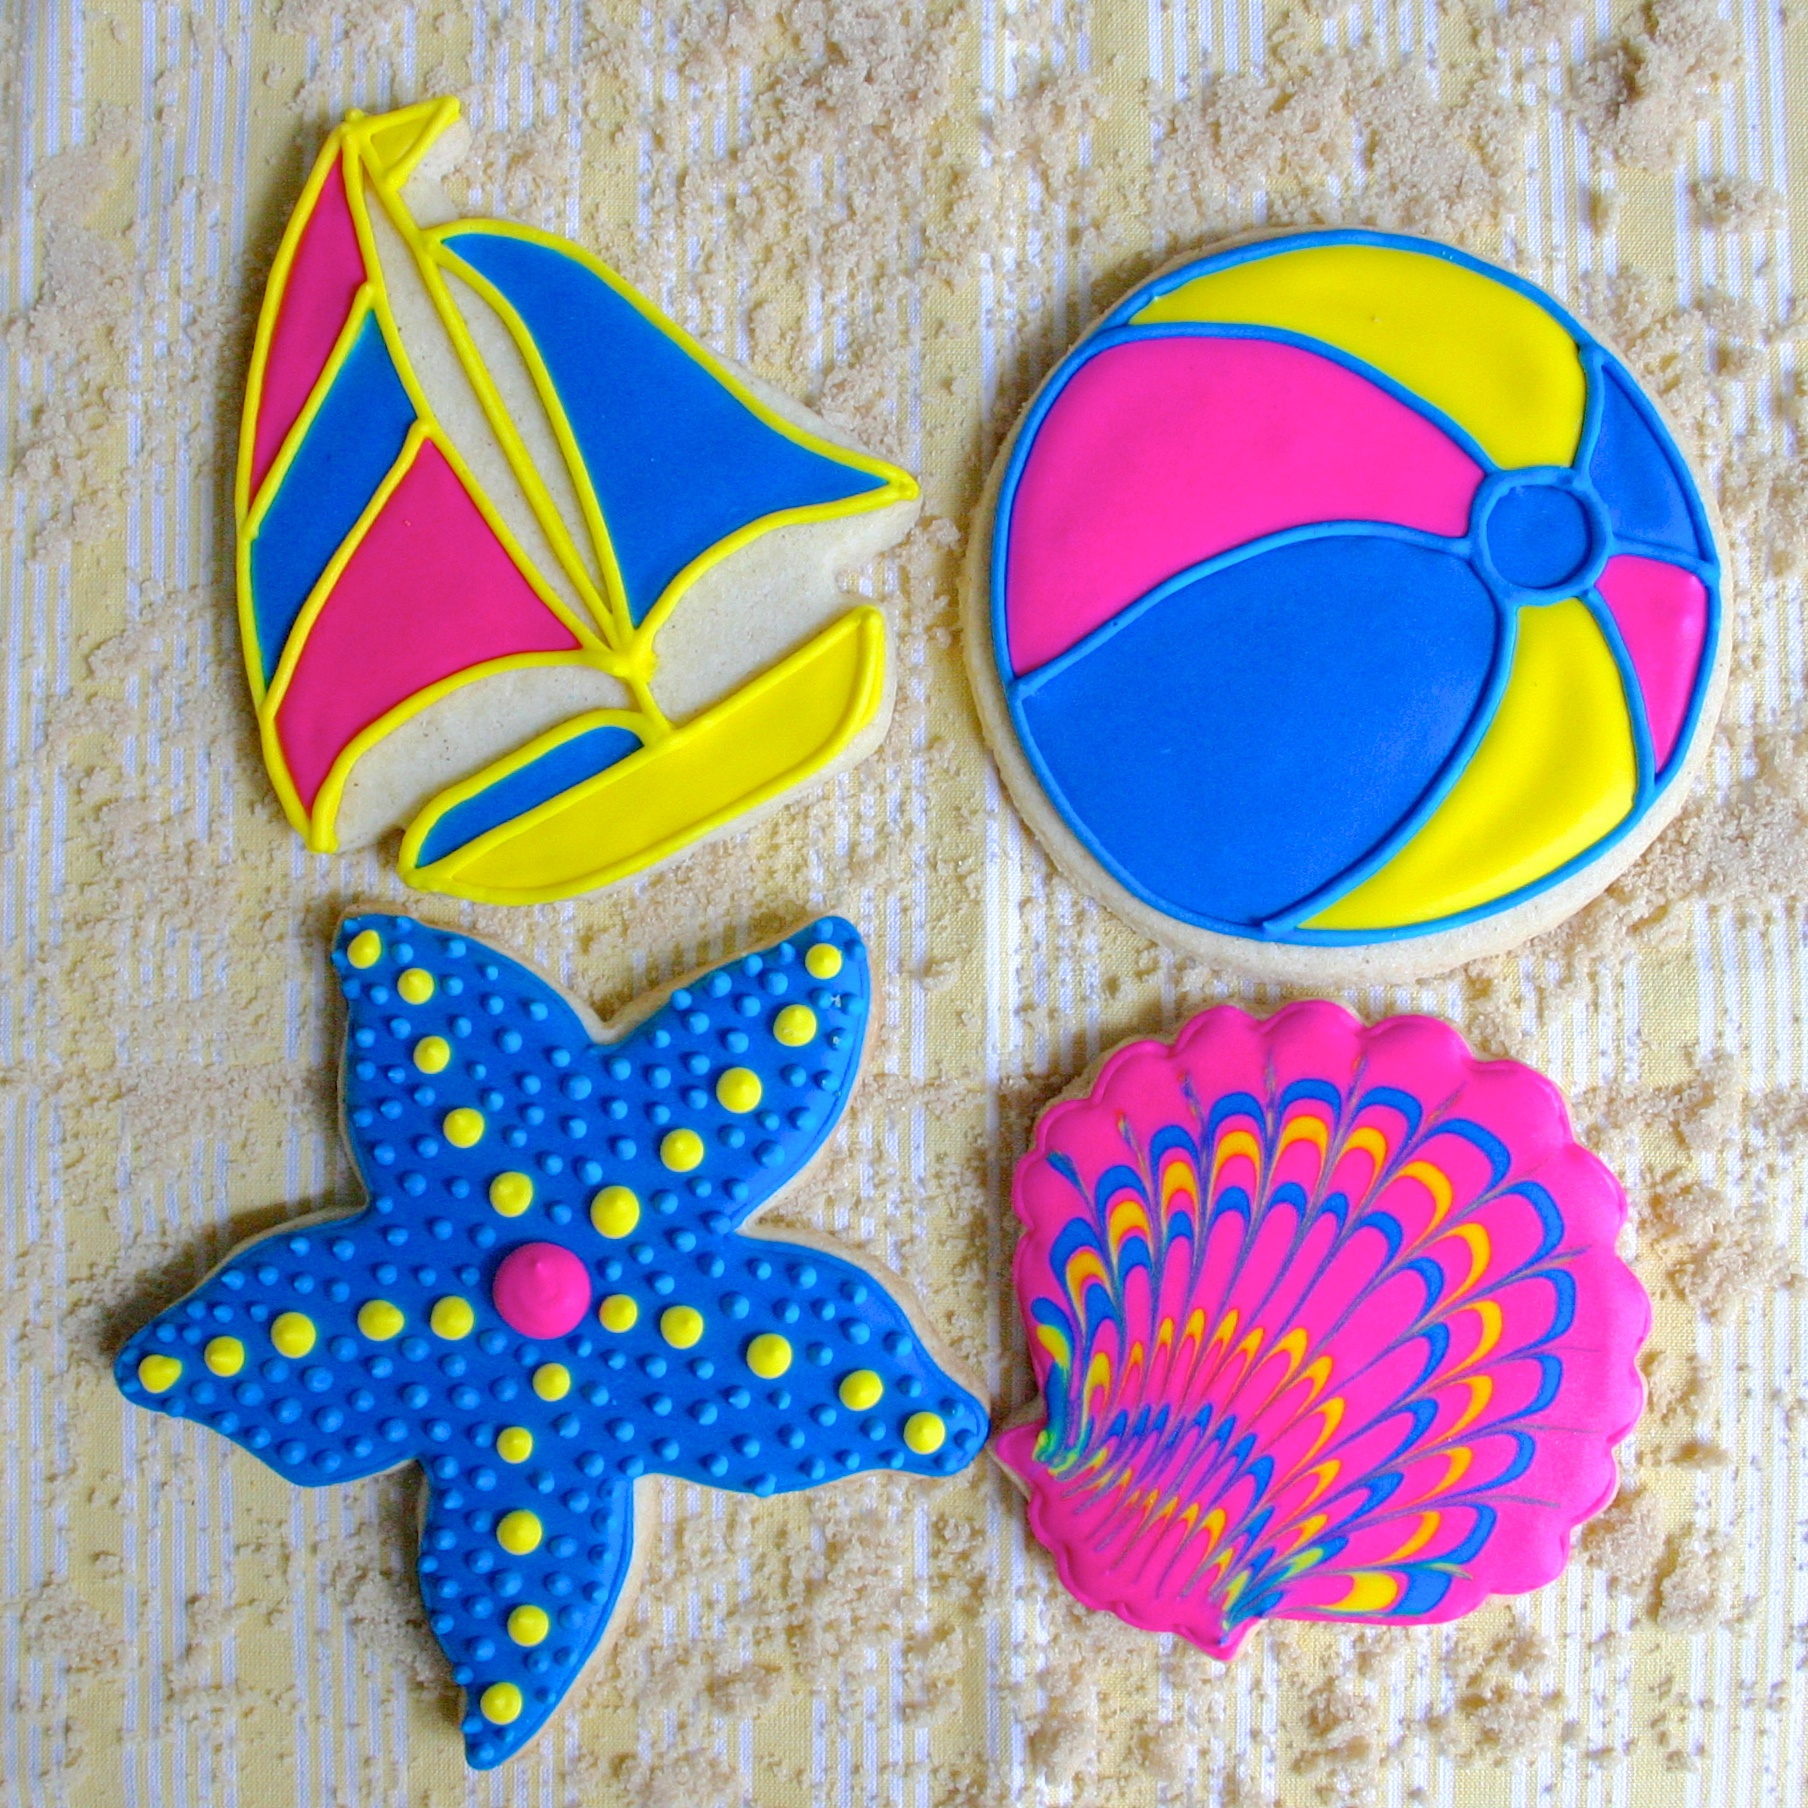
I love making decorative cookies that are bright and fun, and summer is the perfect time to make them! If you remember my ocean cookies you may remember the starfish, sailboats, and seashells, but this time I wanted to amp up the color even more. What more perfect cookies to do to celebrate summer than brightly colored beach themed cookies?
Summer Beach Cookies
Decorating level: Easy-MediumConcept, design, and execution by Jesika Rose
- Gluten Free Sugar Dough Recipe or my gluten free chocolate sugar dough
- Royal Icing Recipe
- 4" round cookie cutter, starfish cutter, sailboat cutter, and seashell cutter
- 6 Decorating bags, couplers, tips, and rubber bands
- Three-Six #2 round tips
- Three #3 round tips
- Food Safe Markers
- Toothpicks
- Gel food coloring:
- Lemon Yellow
- Sky Blue
- Deep Pink or Soft Pink with a drop of Fuschia
Once your cookies are baked and fully cooled, you can begin to decorate! Since they all use the same three colors, I would decorate them silmultanouesly, however, I will lead this tutorial one by one. So basically, I would do all the outlines, then all the flooding and first layers, then all the second layers once the first are fully dried.
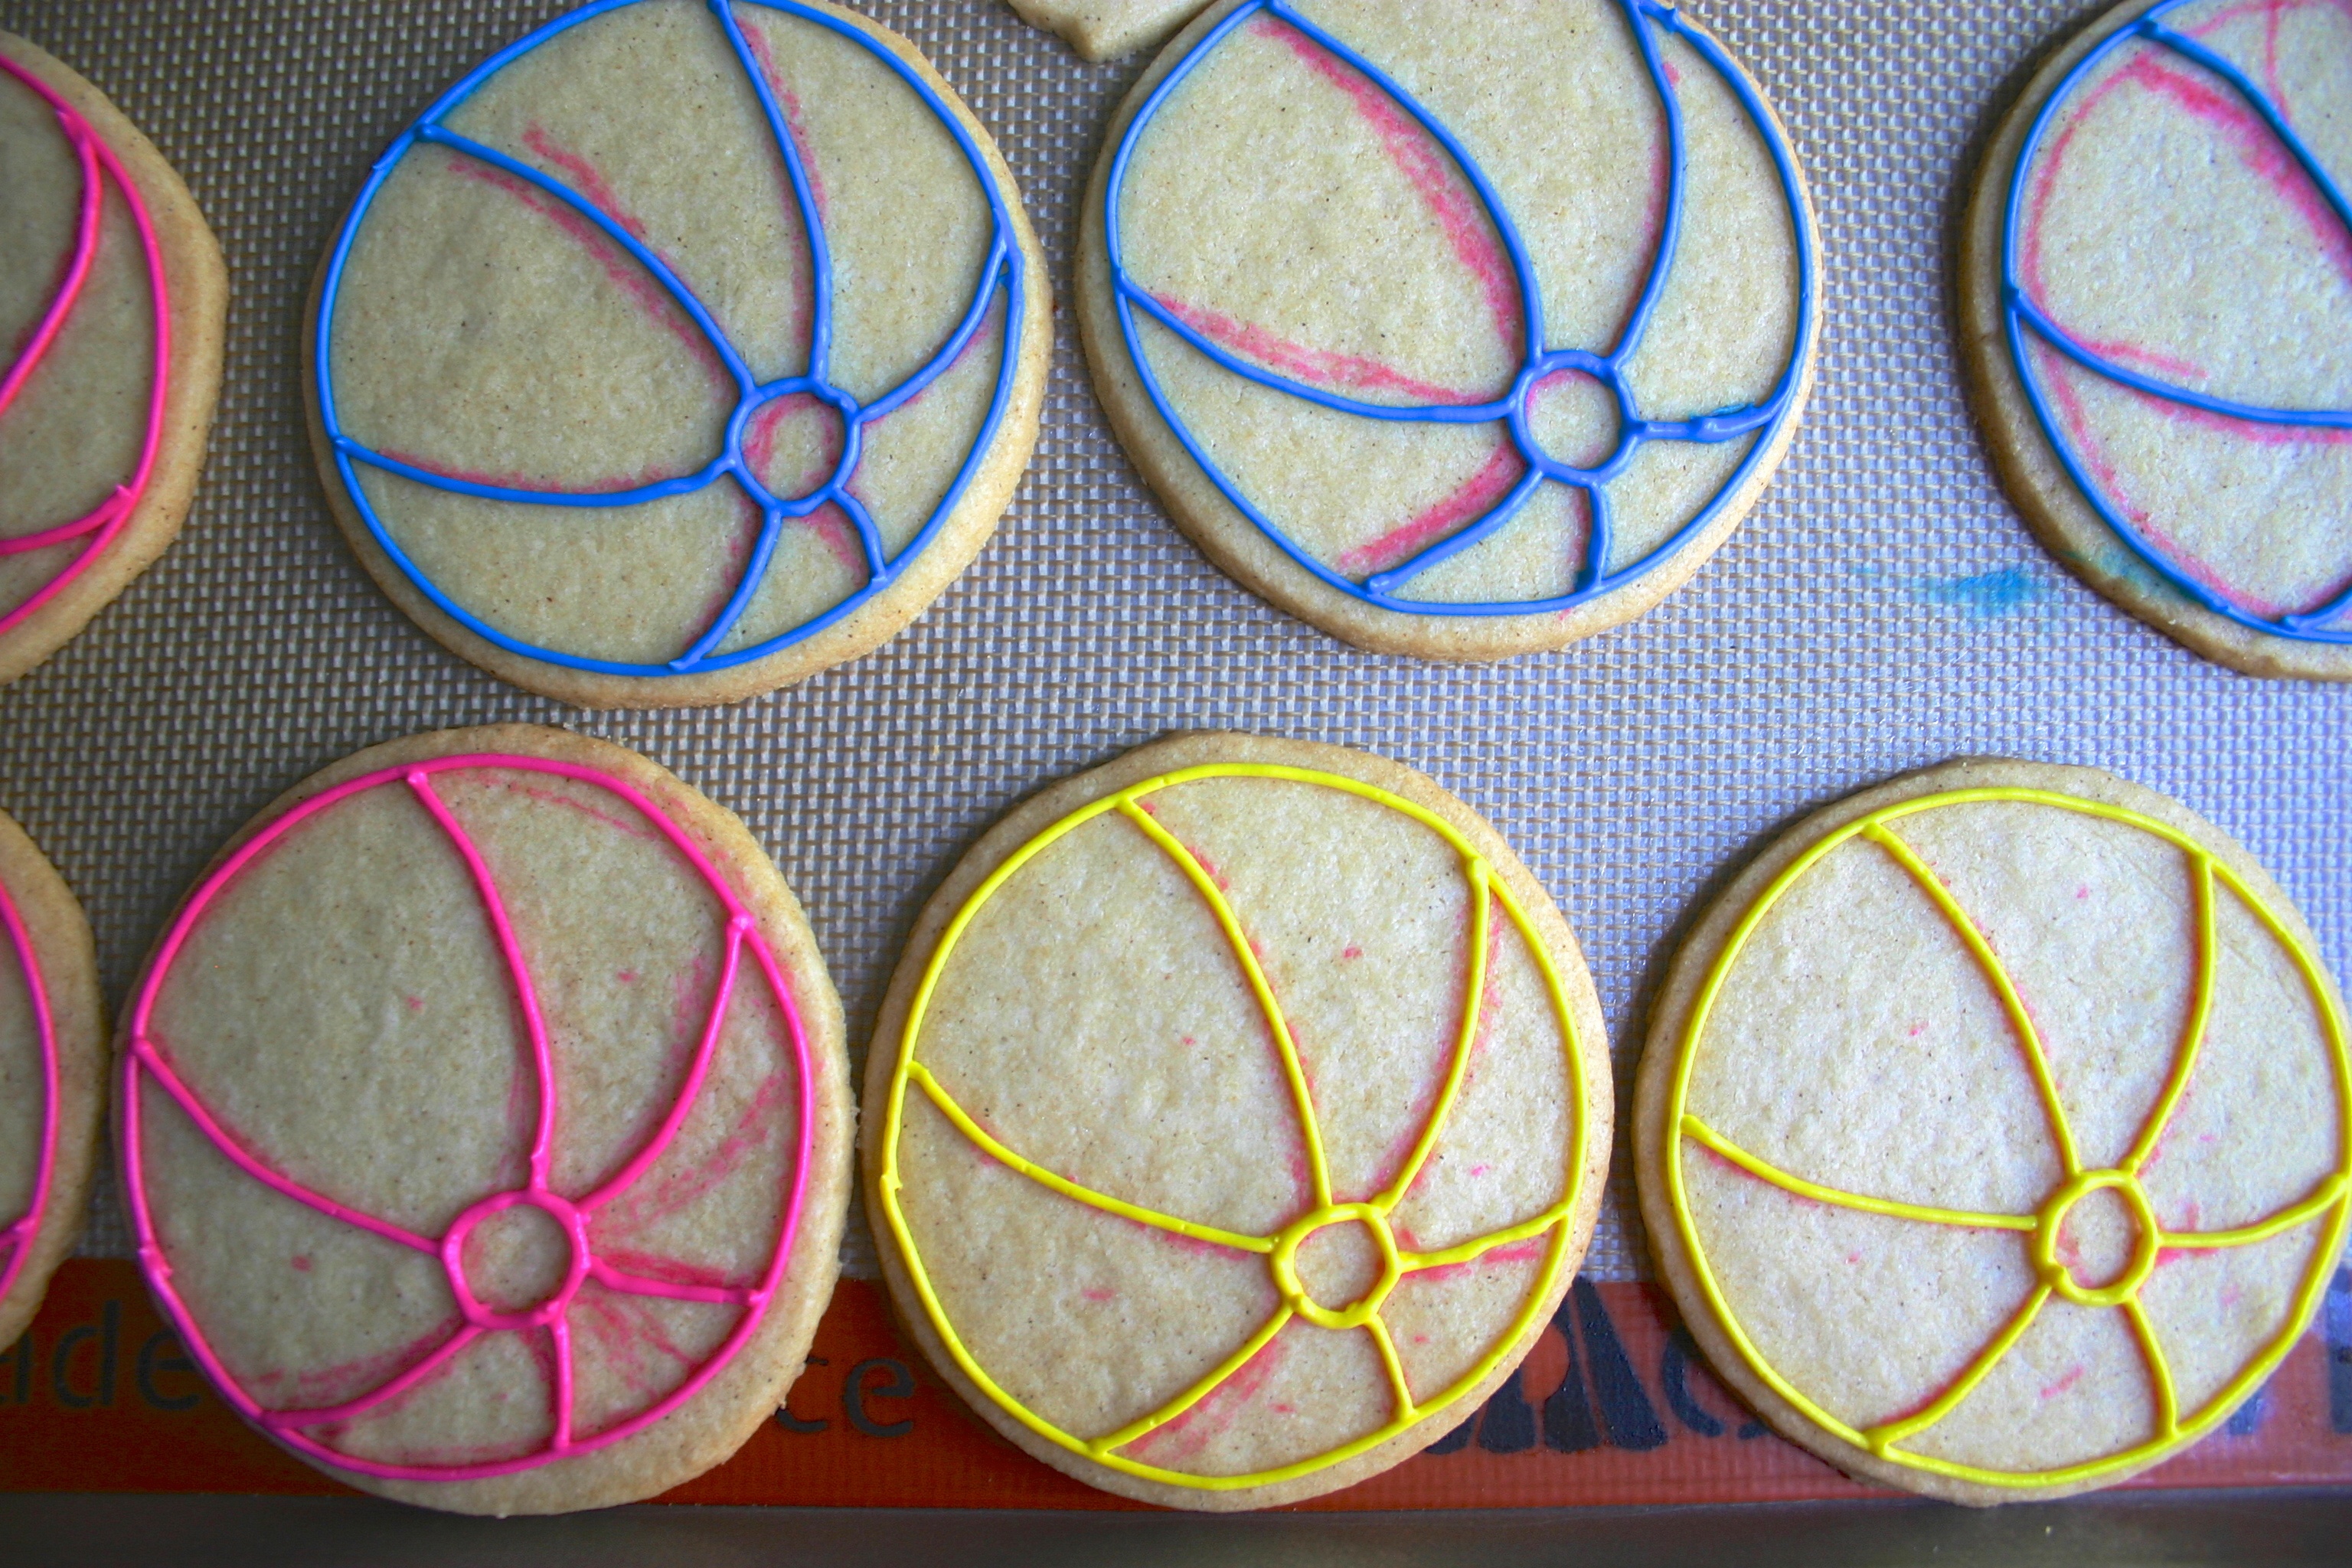
Prepare a thick, outline bag with a #2 tip and a flooding bag with a #2 or #3 tip of each color. So six bags in total, two of each color, two different viscosities.

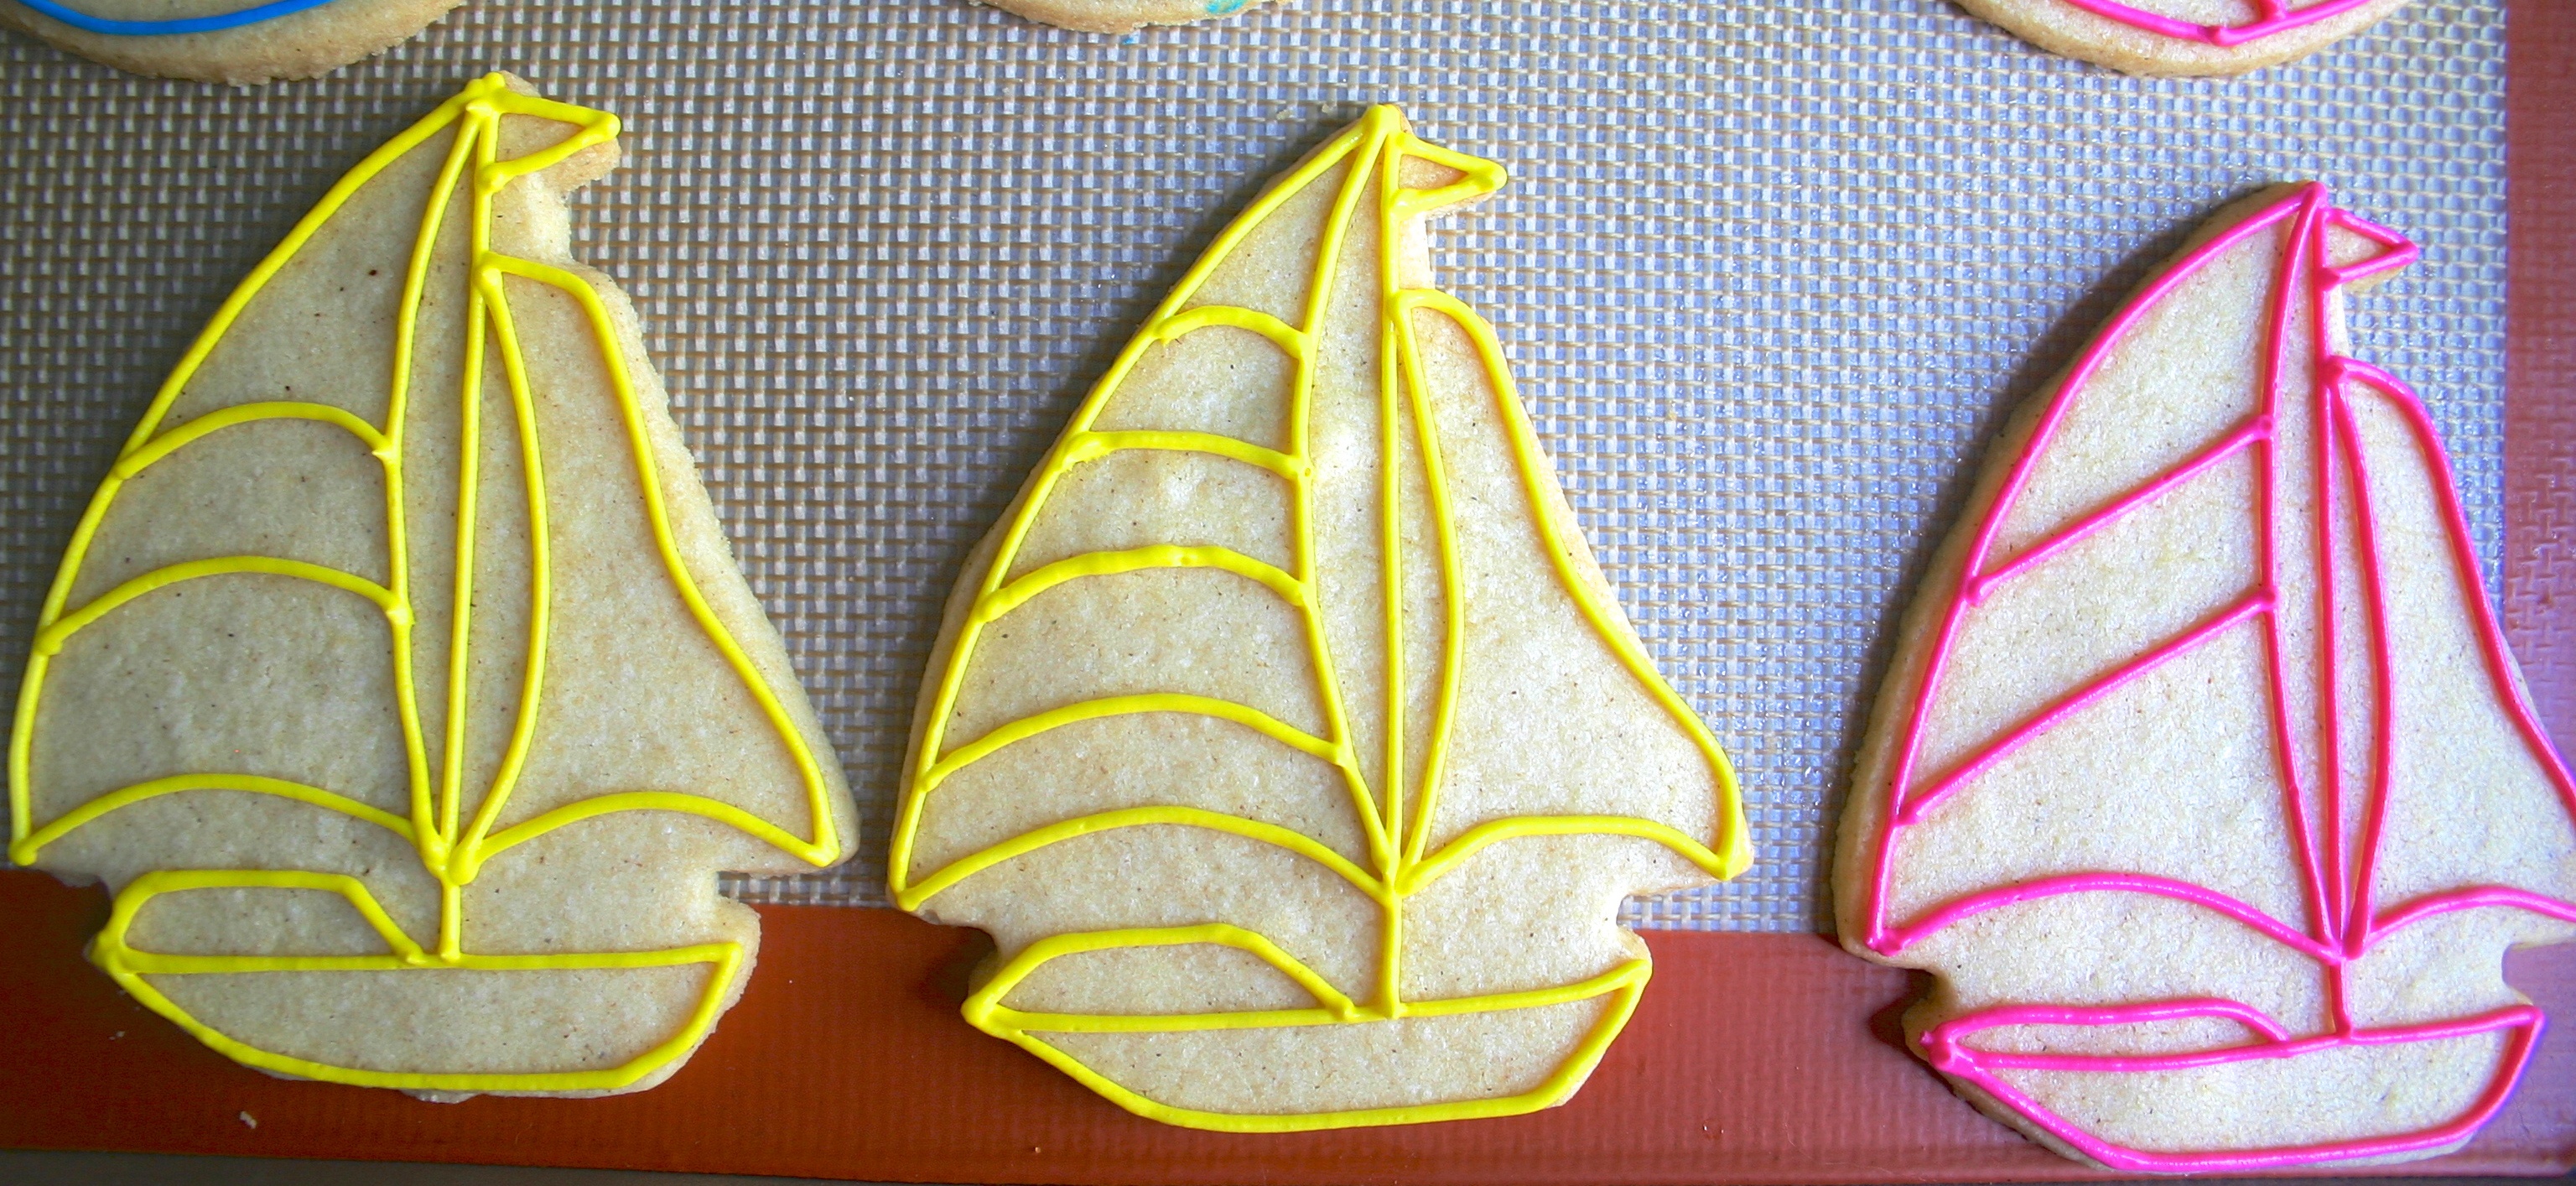
Allow the outline to dry before flooding.
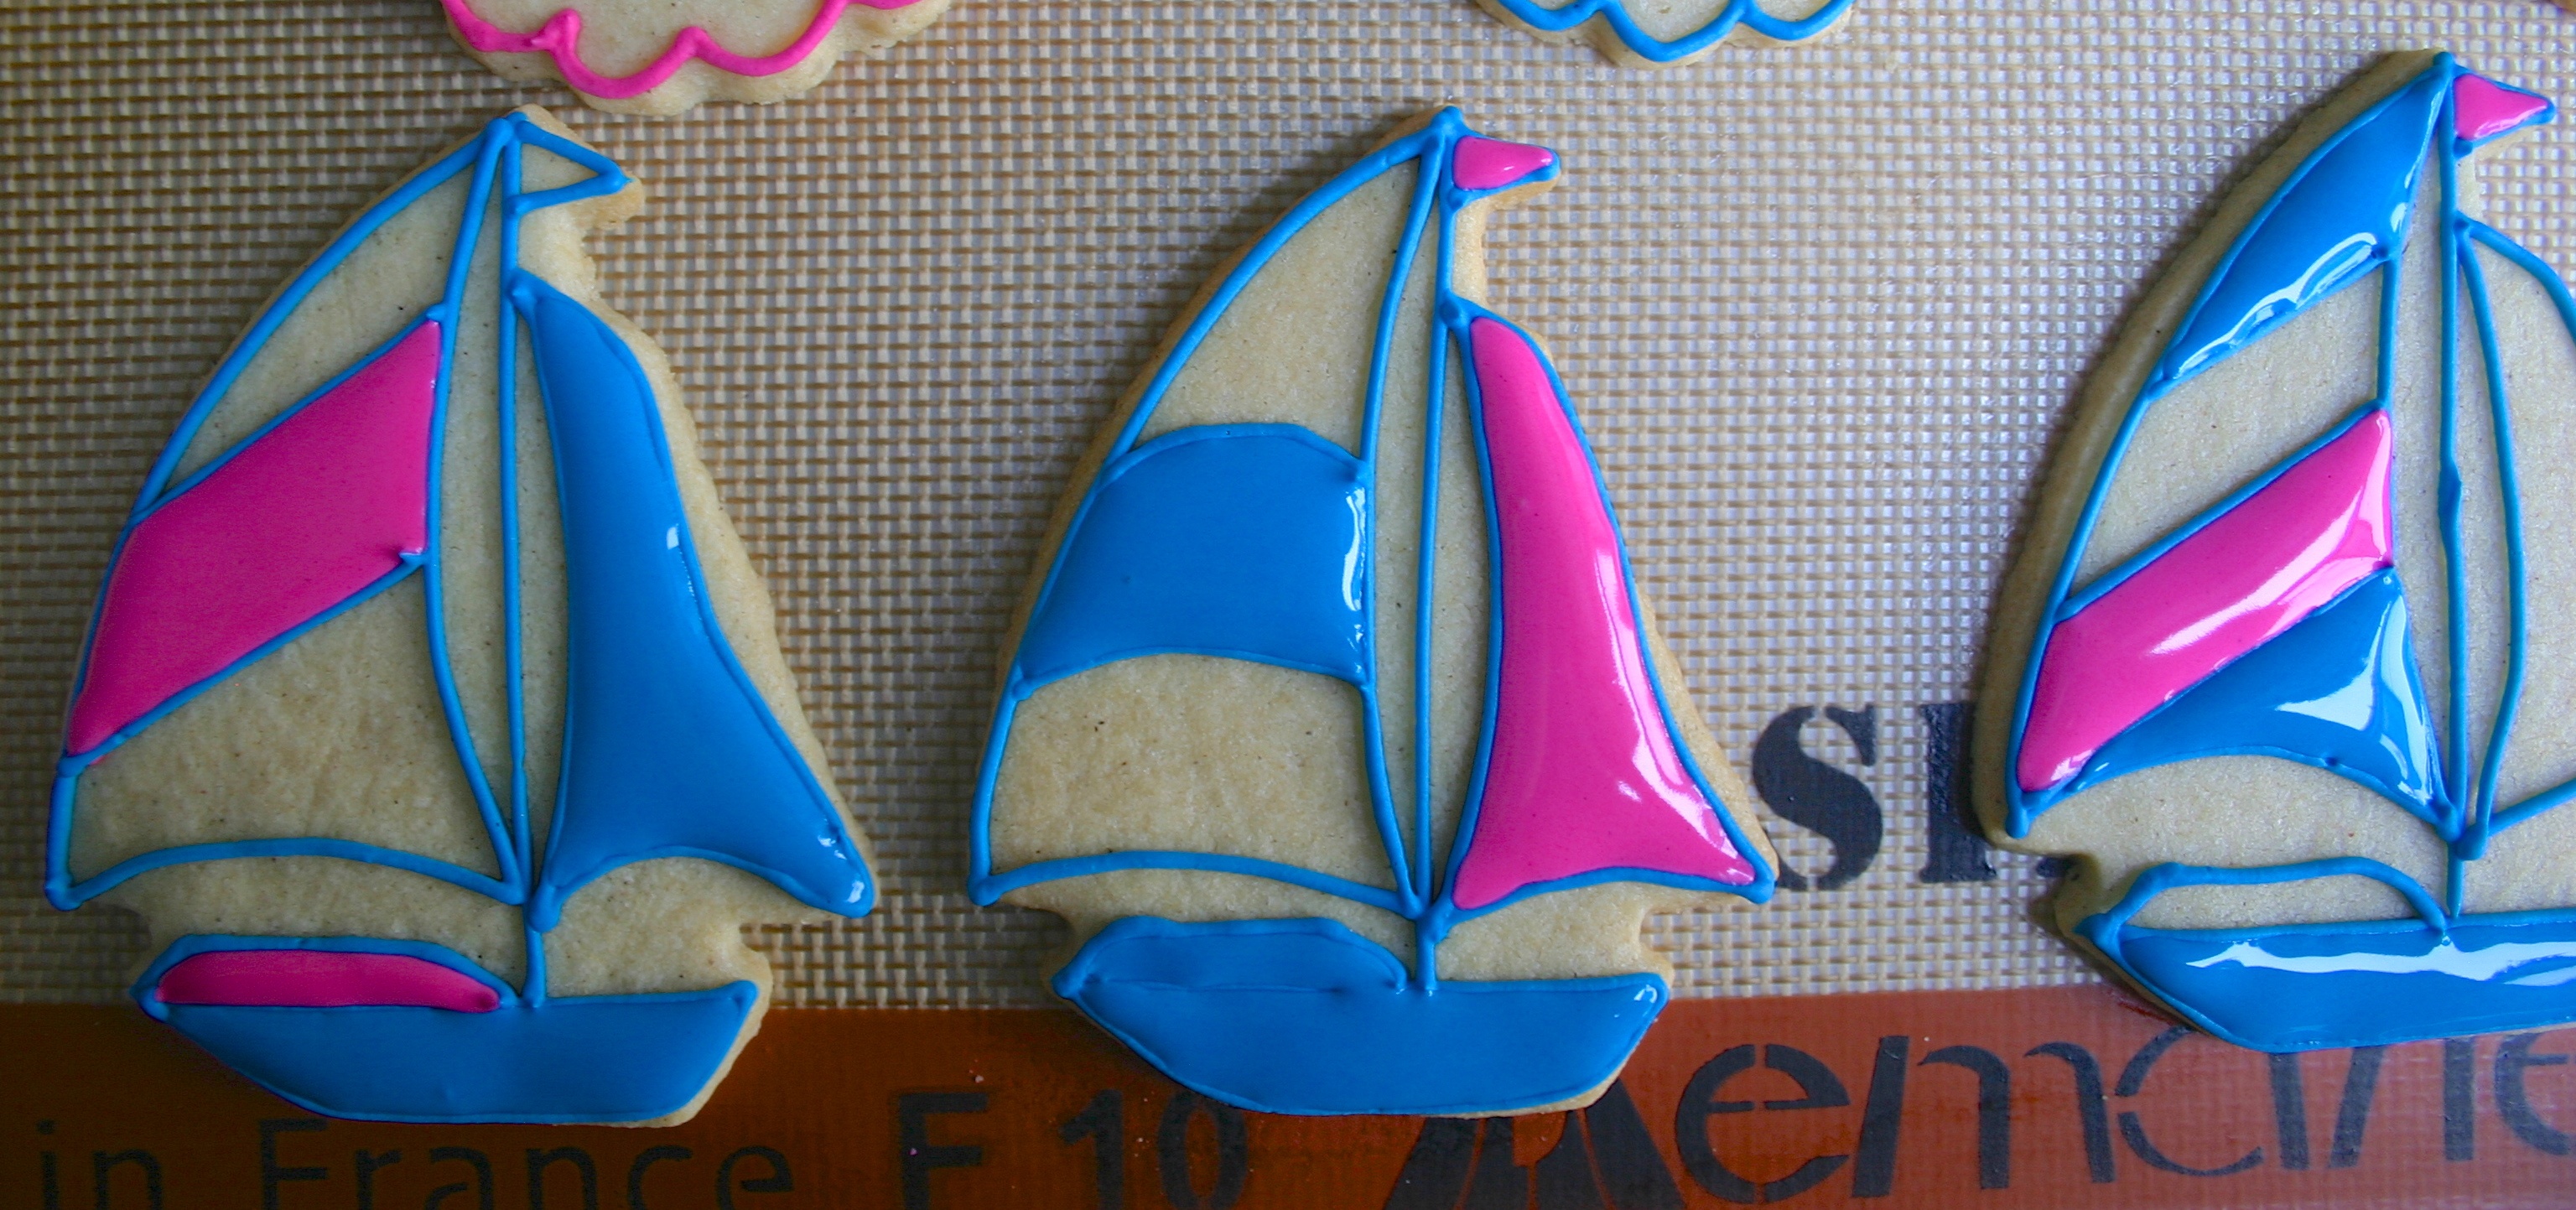

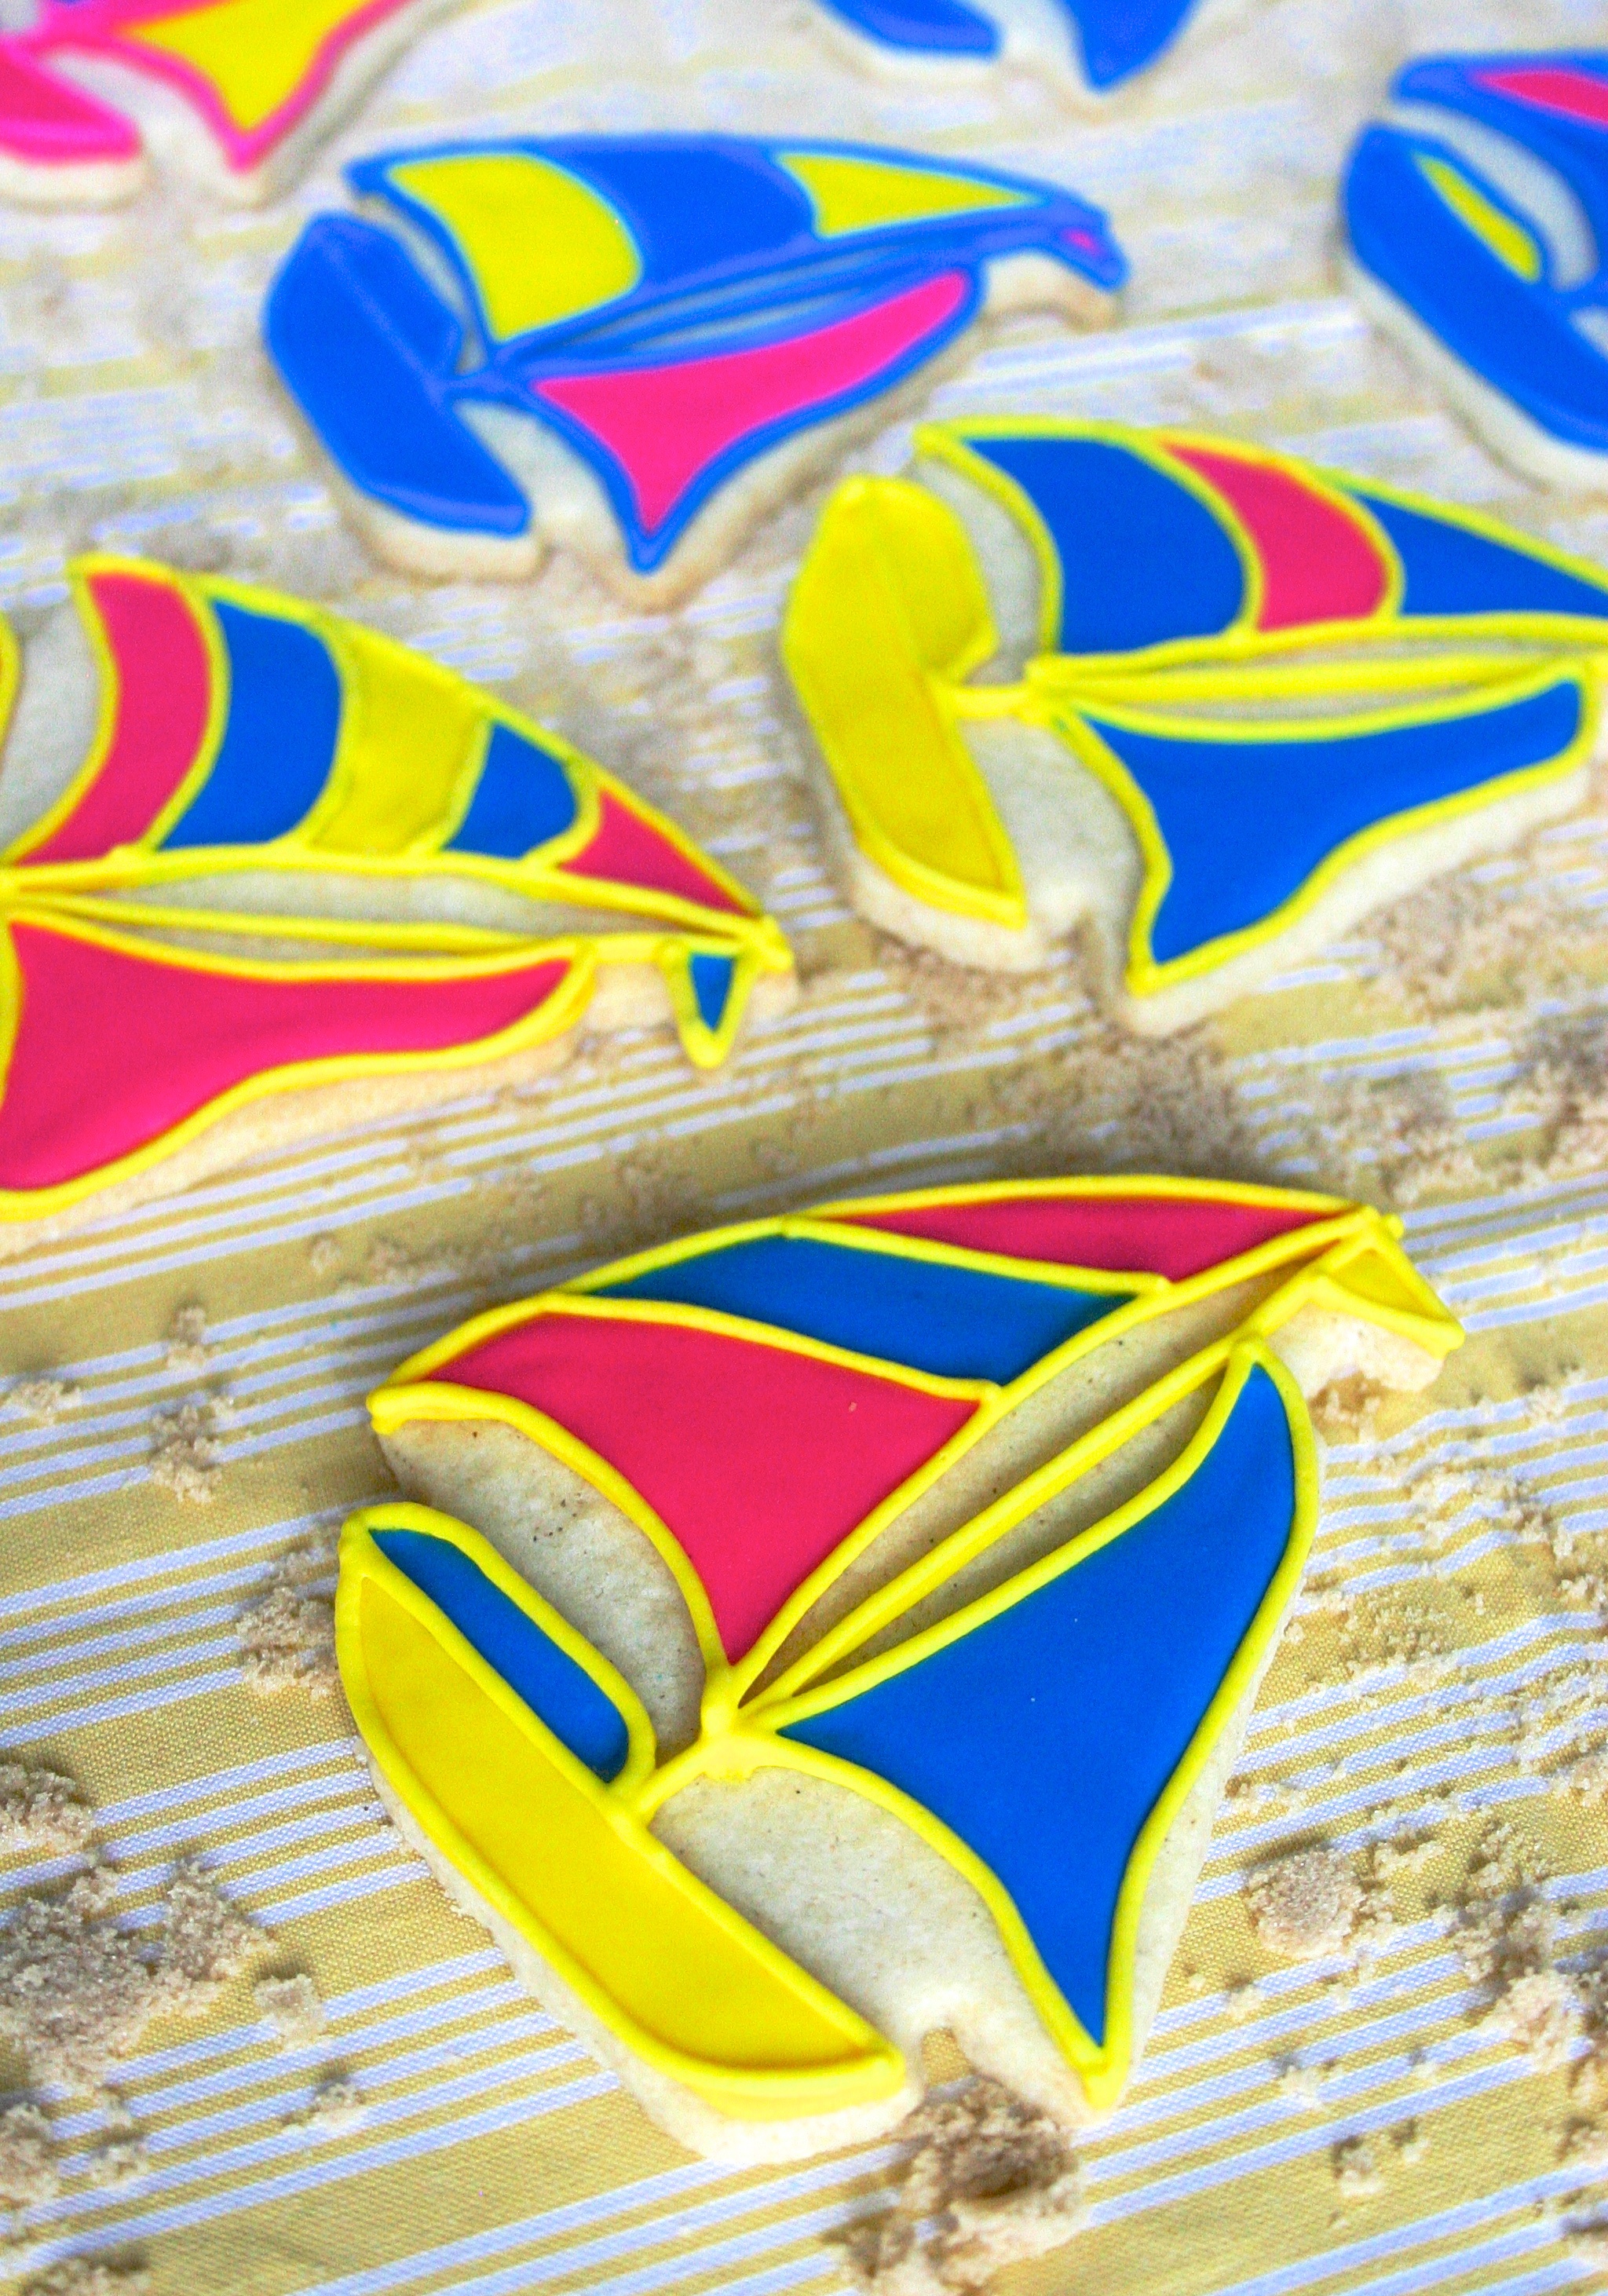

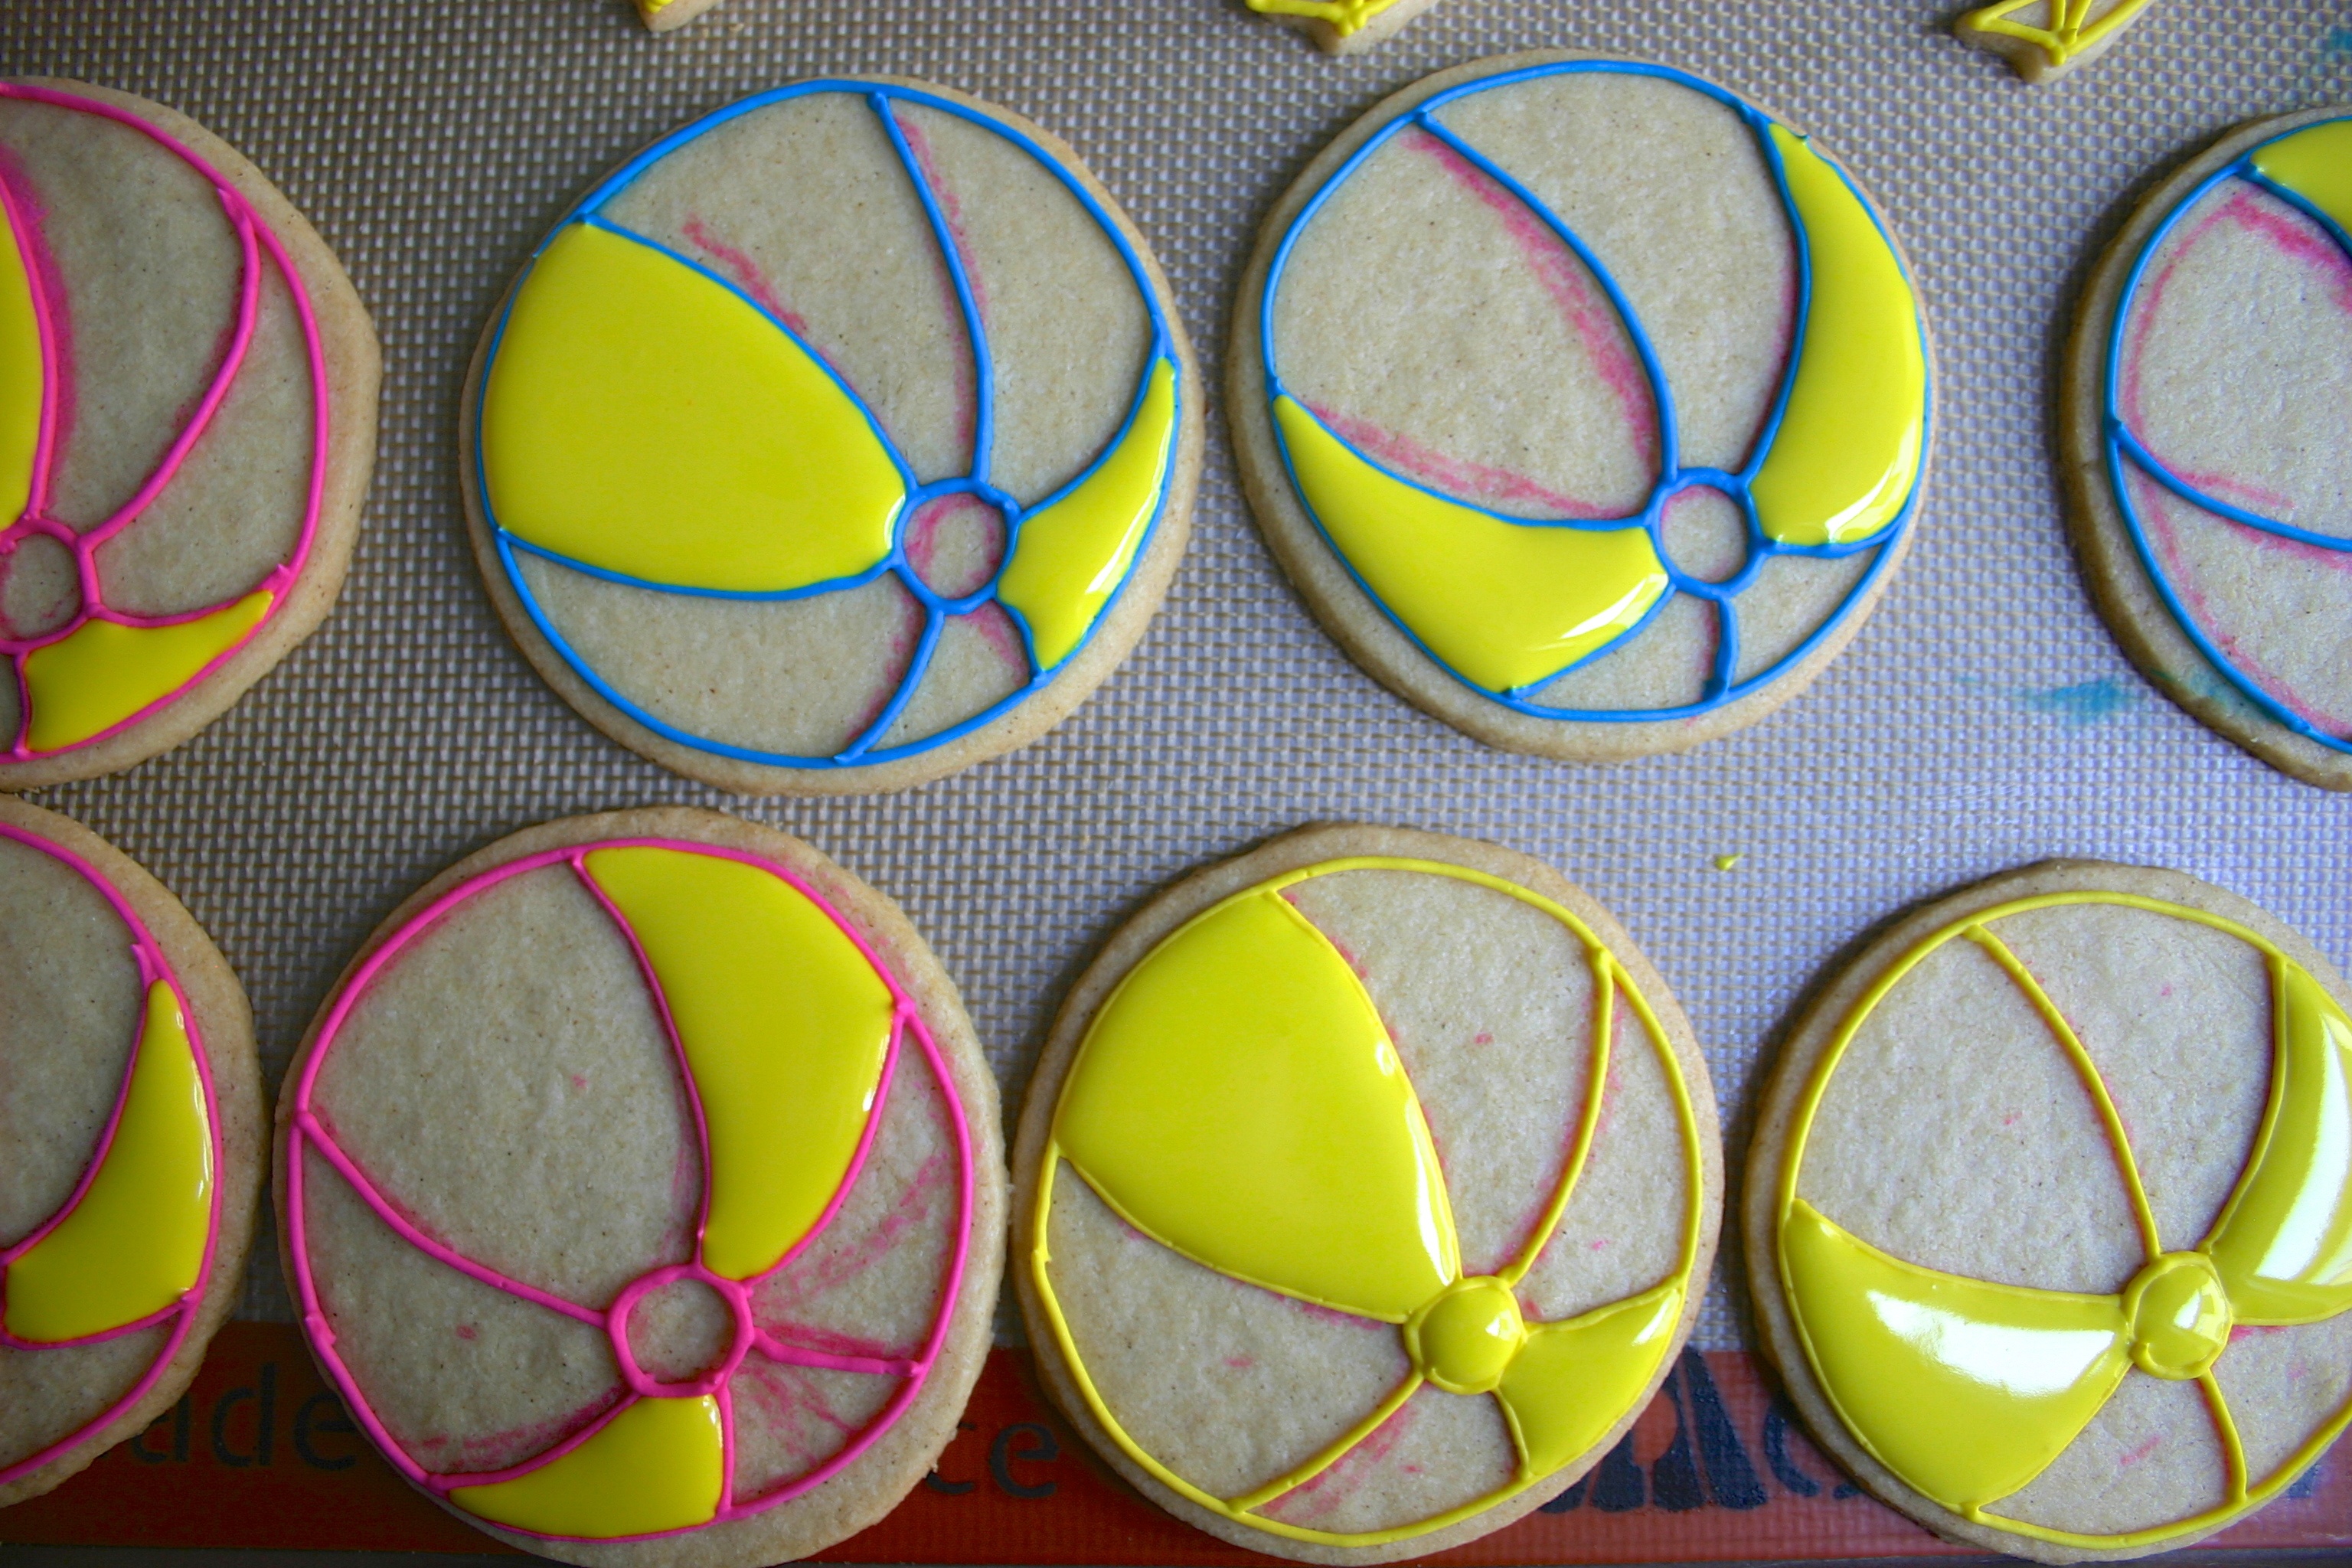
Once the outline is dry, fill with the flood icing. If you are using three colors, fill the opposite sections with the same color, leaving two empty sections in between. When filling the 2nd color, make sure to do the same. Finish with the third.
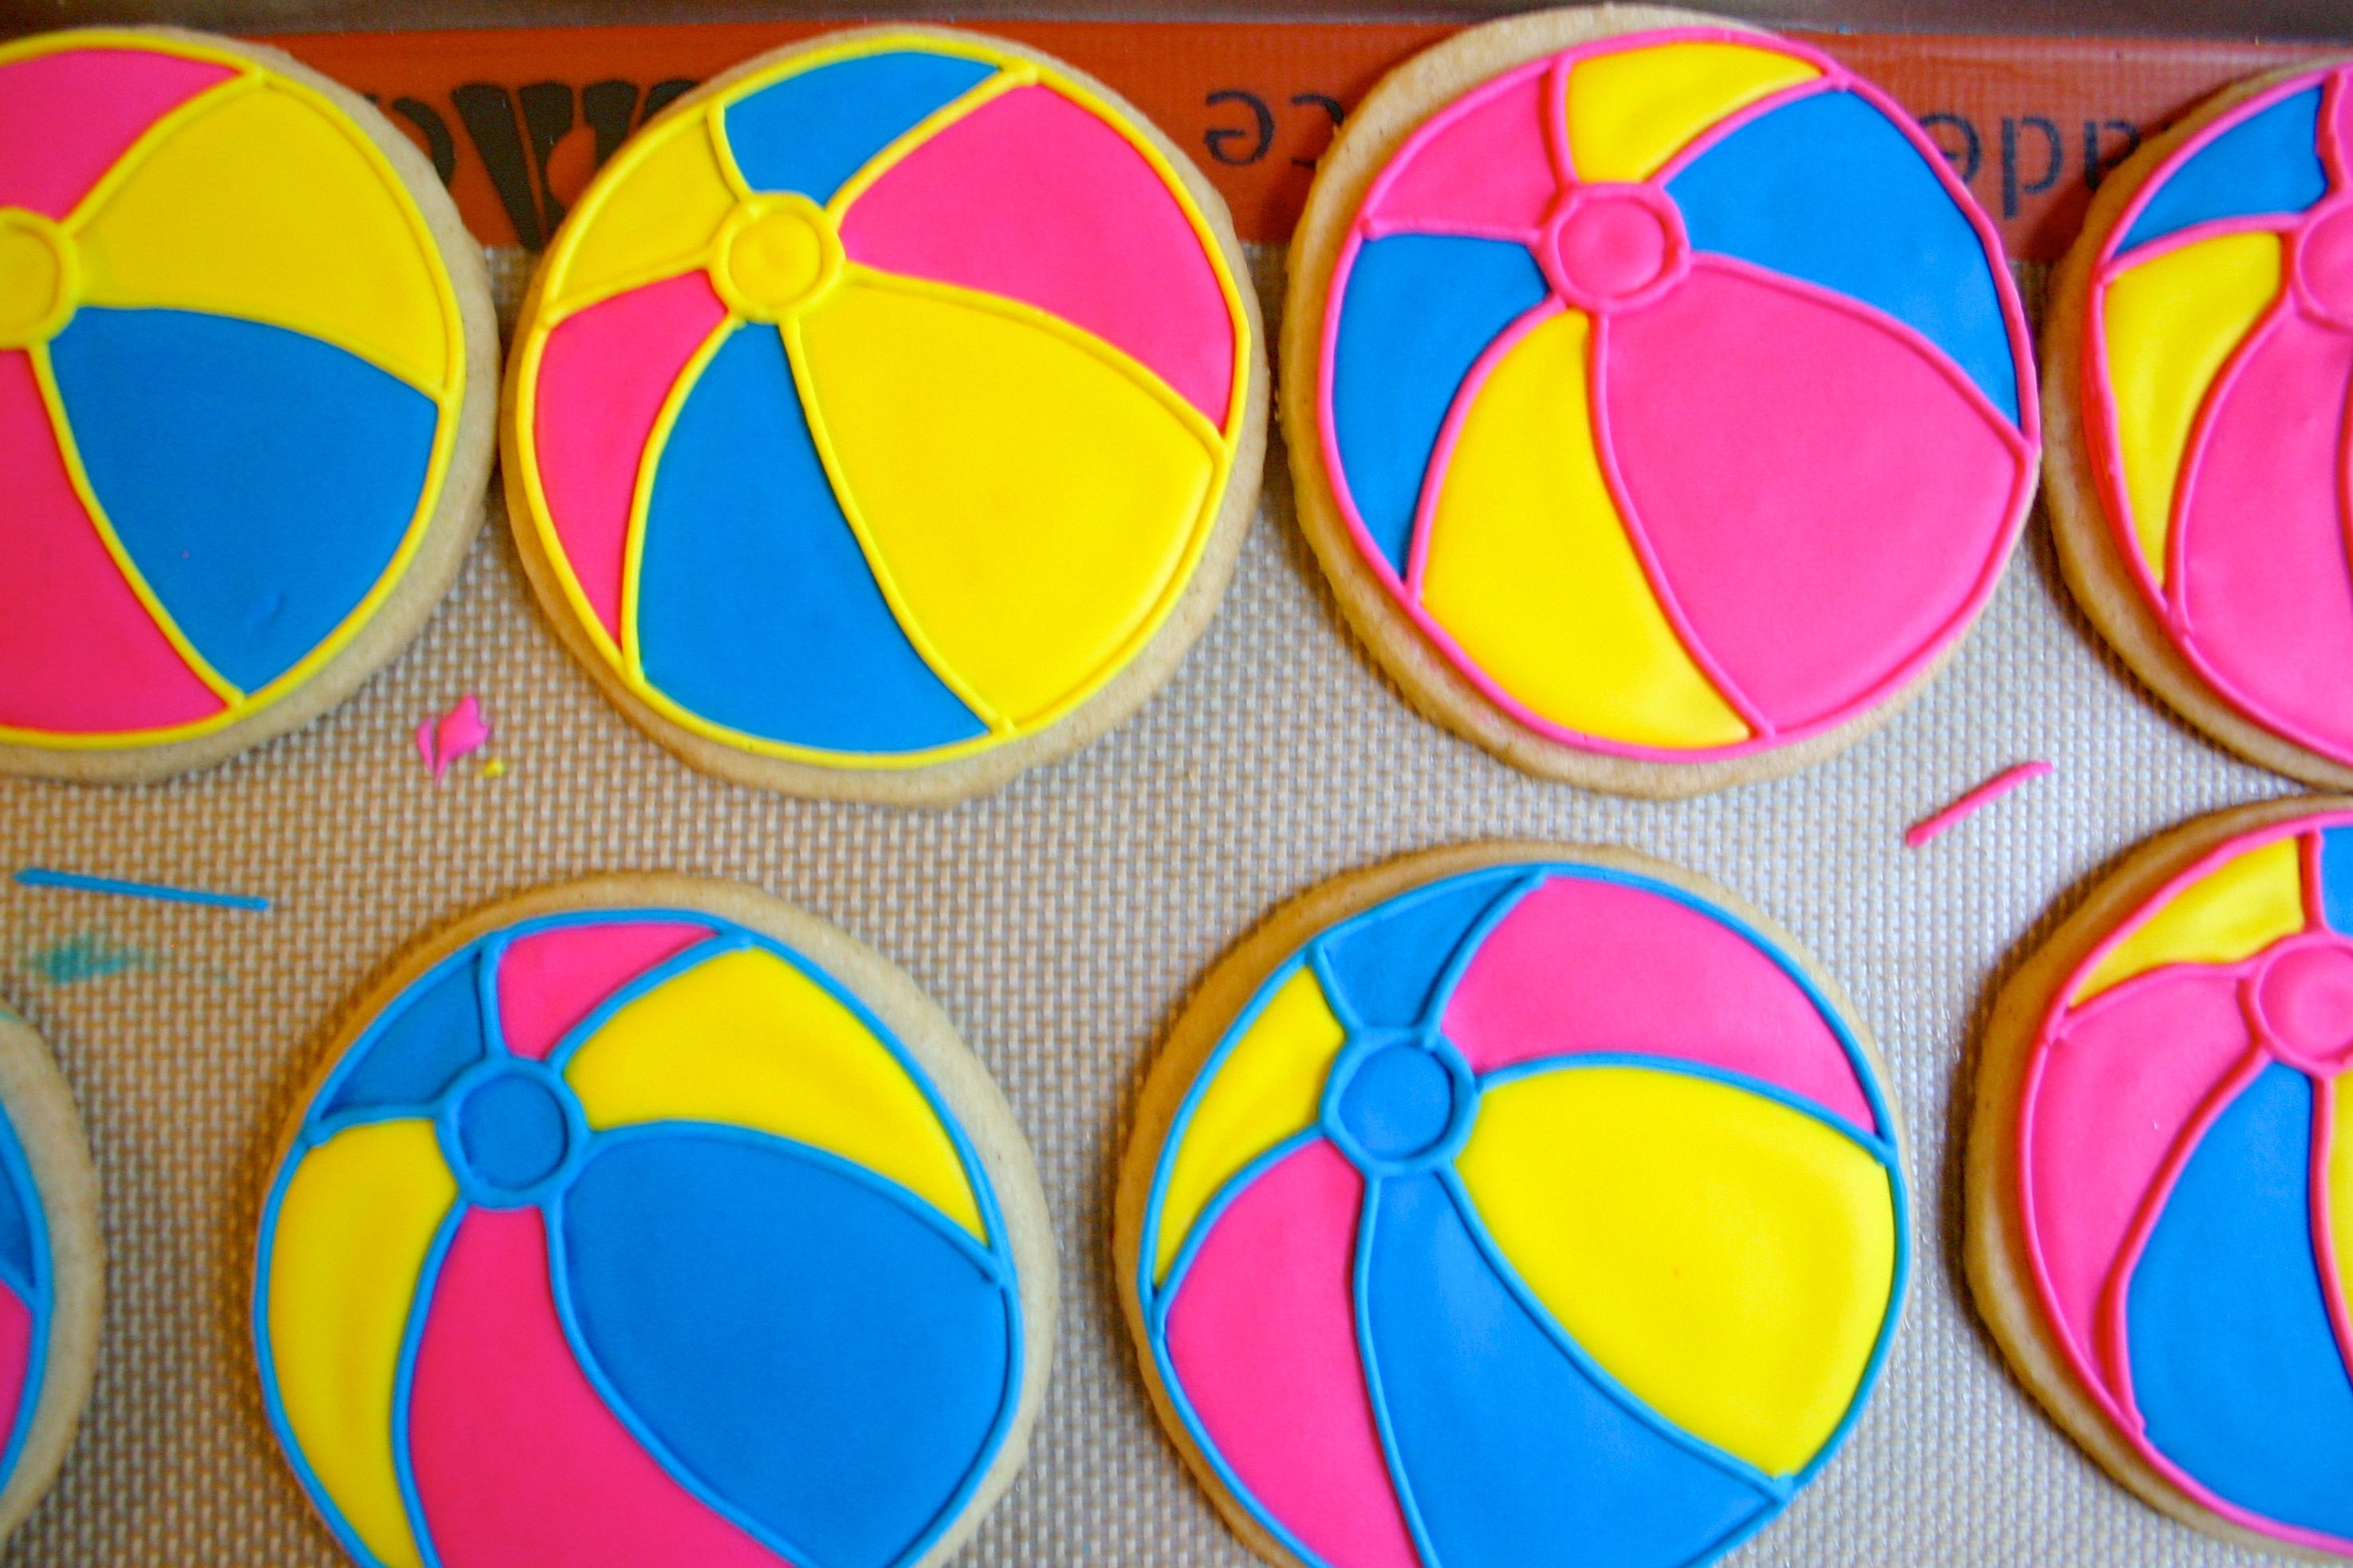
Once the beach ball is completely filled and that layer is completely dry, re outline with the thick icing to define it again.

Allow to completely dry and the beach balls are done!
Now for the starfish. If you're on vine, follow me on vine for decorating and baking videos!
Here are my vine's for the process for the starfish:
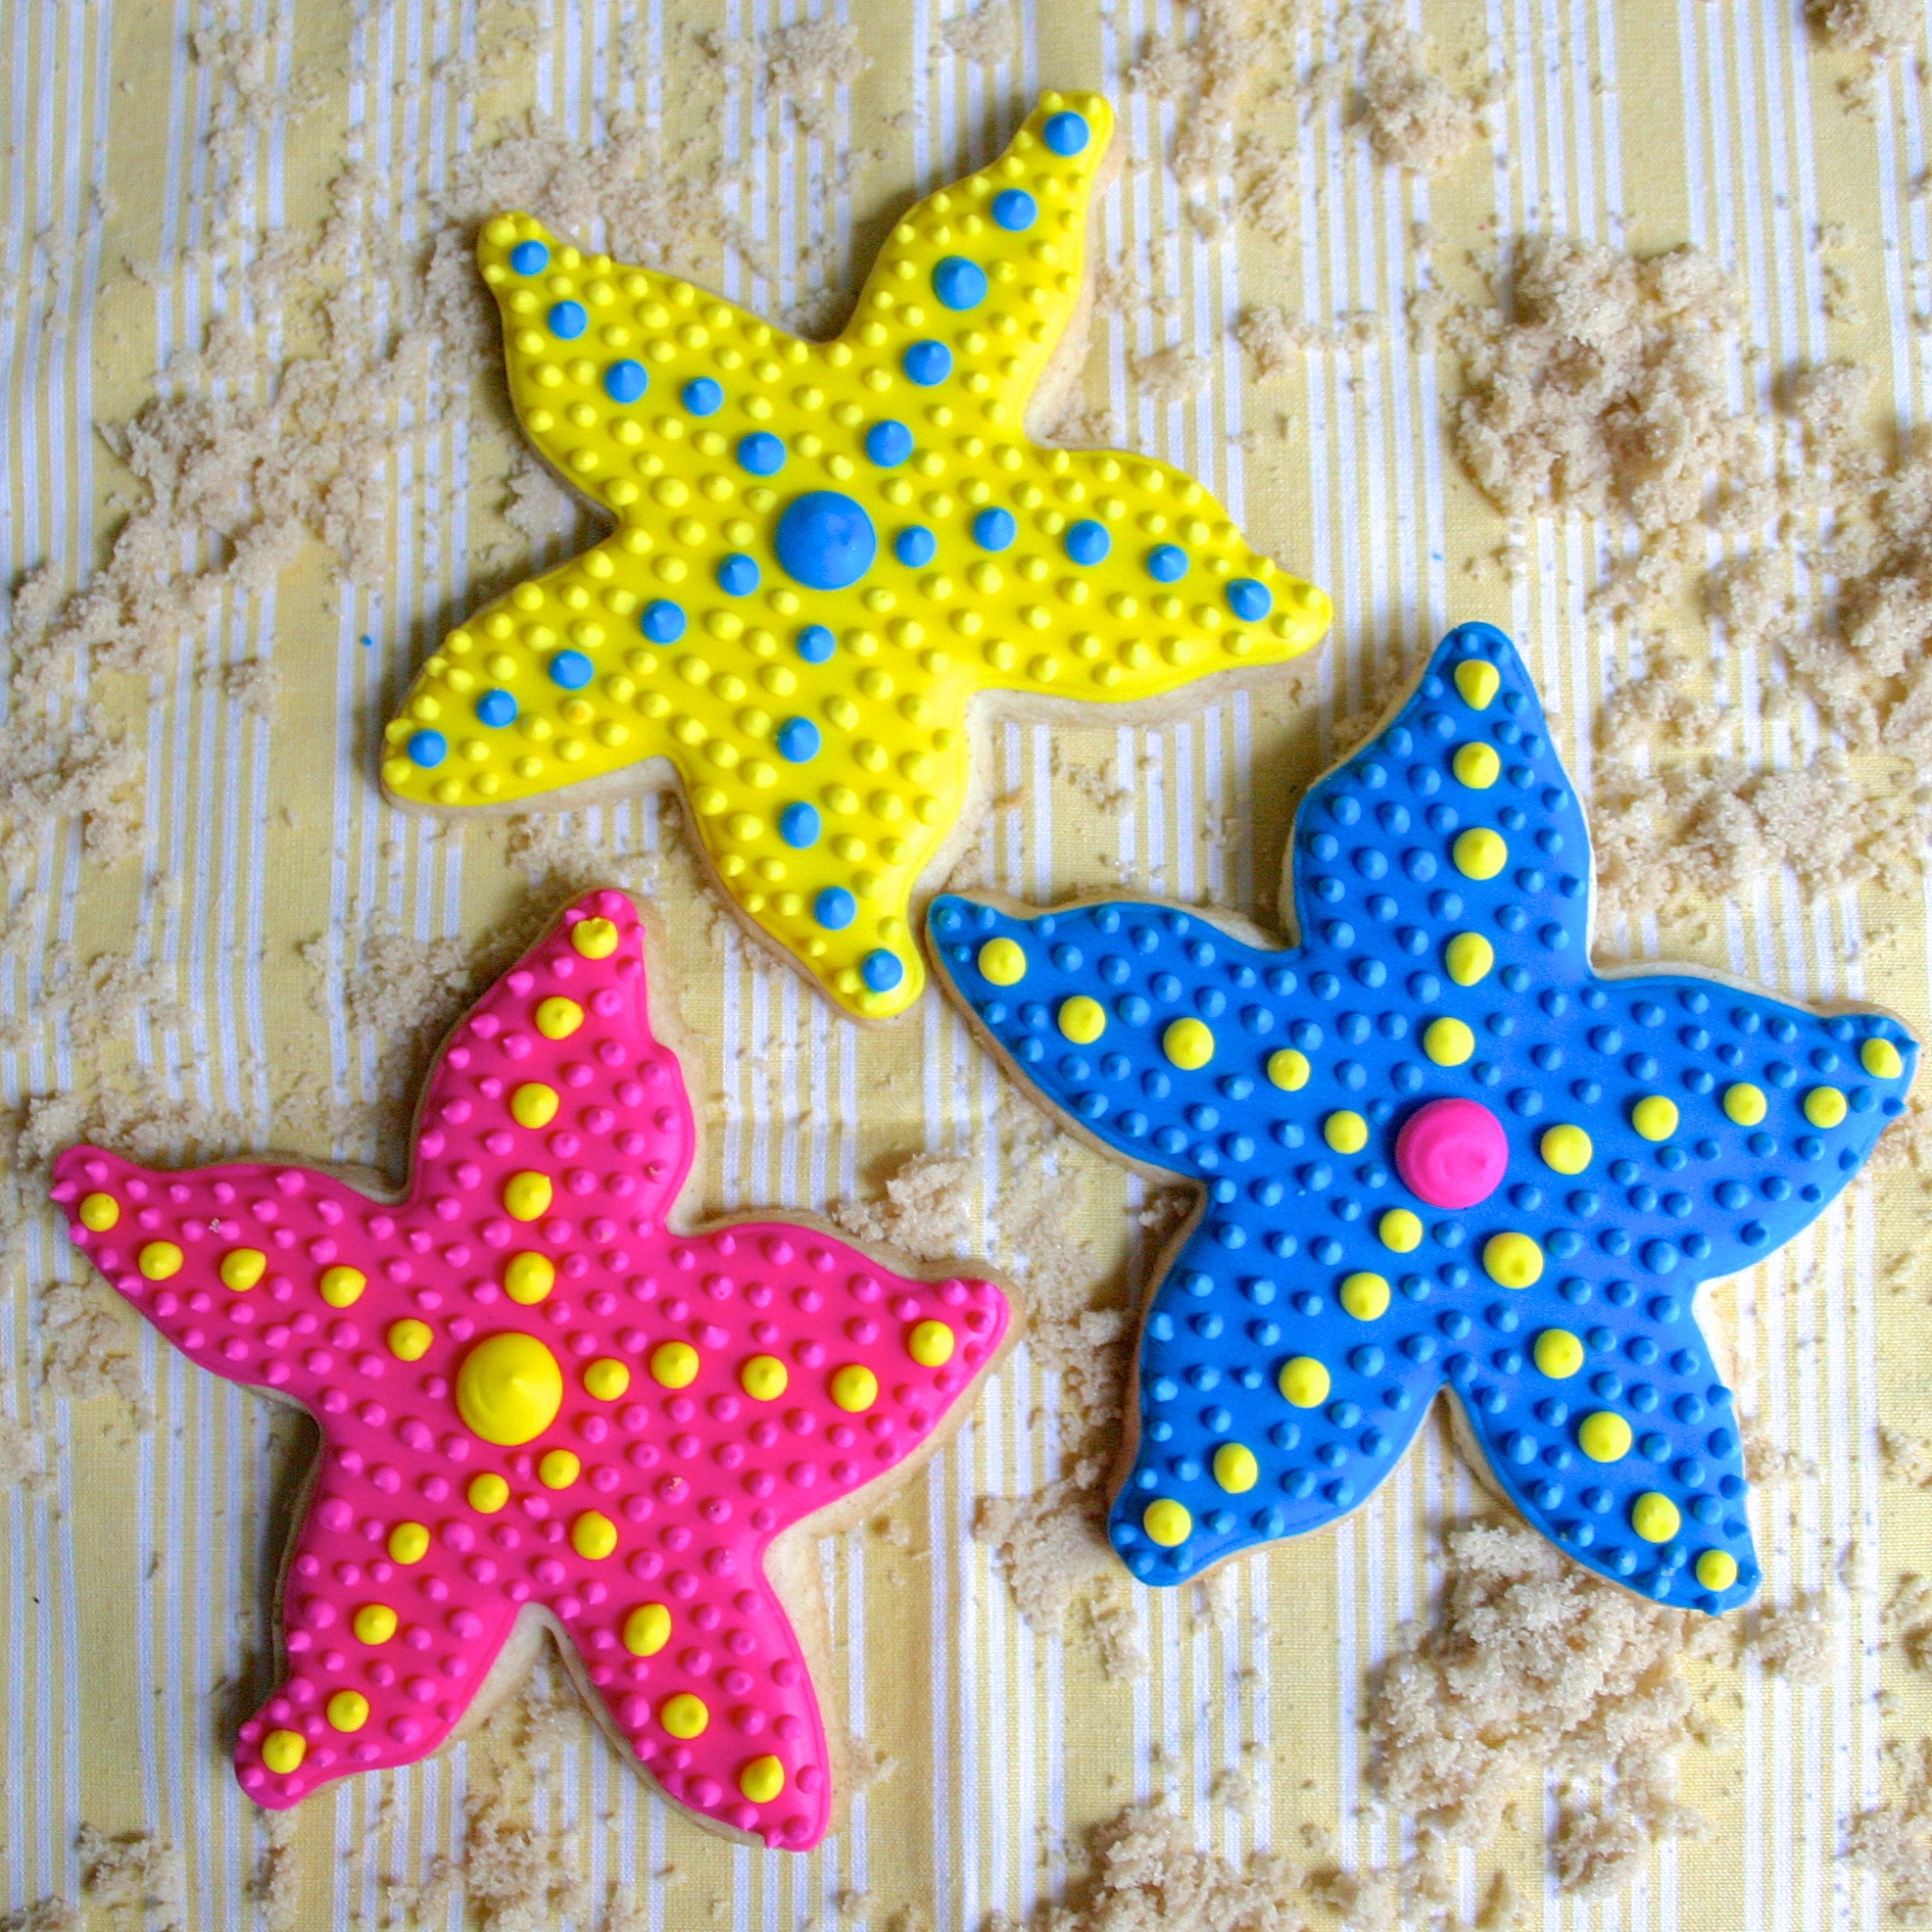
Outline and fill all the starfish solidly and allow to completely dry.
Once the bottom layer is completely dry, using the thick icing do the dots on the second layer. I used different colors for the center, large, dot and for the medium sized dots on the arm. Then I filled in with small dots that matched the flood color for texture.

The starfish are now complete! A little different process than the previous too but still pretty easy!
And last but not least:
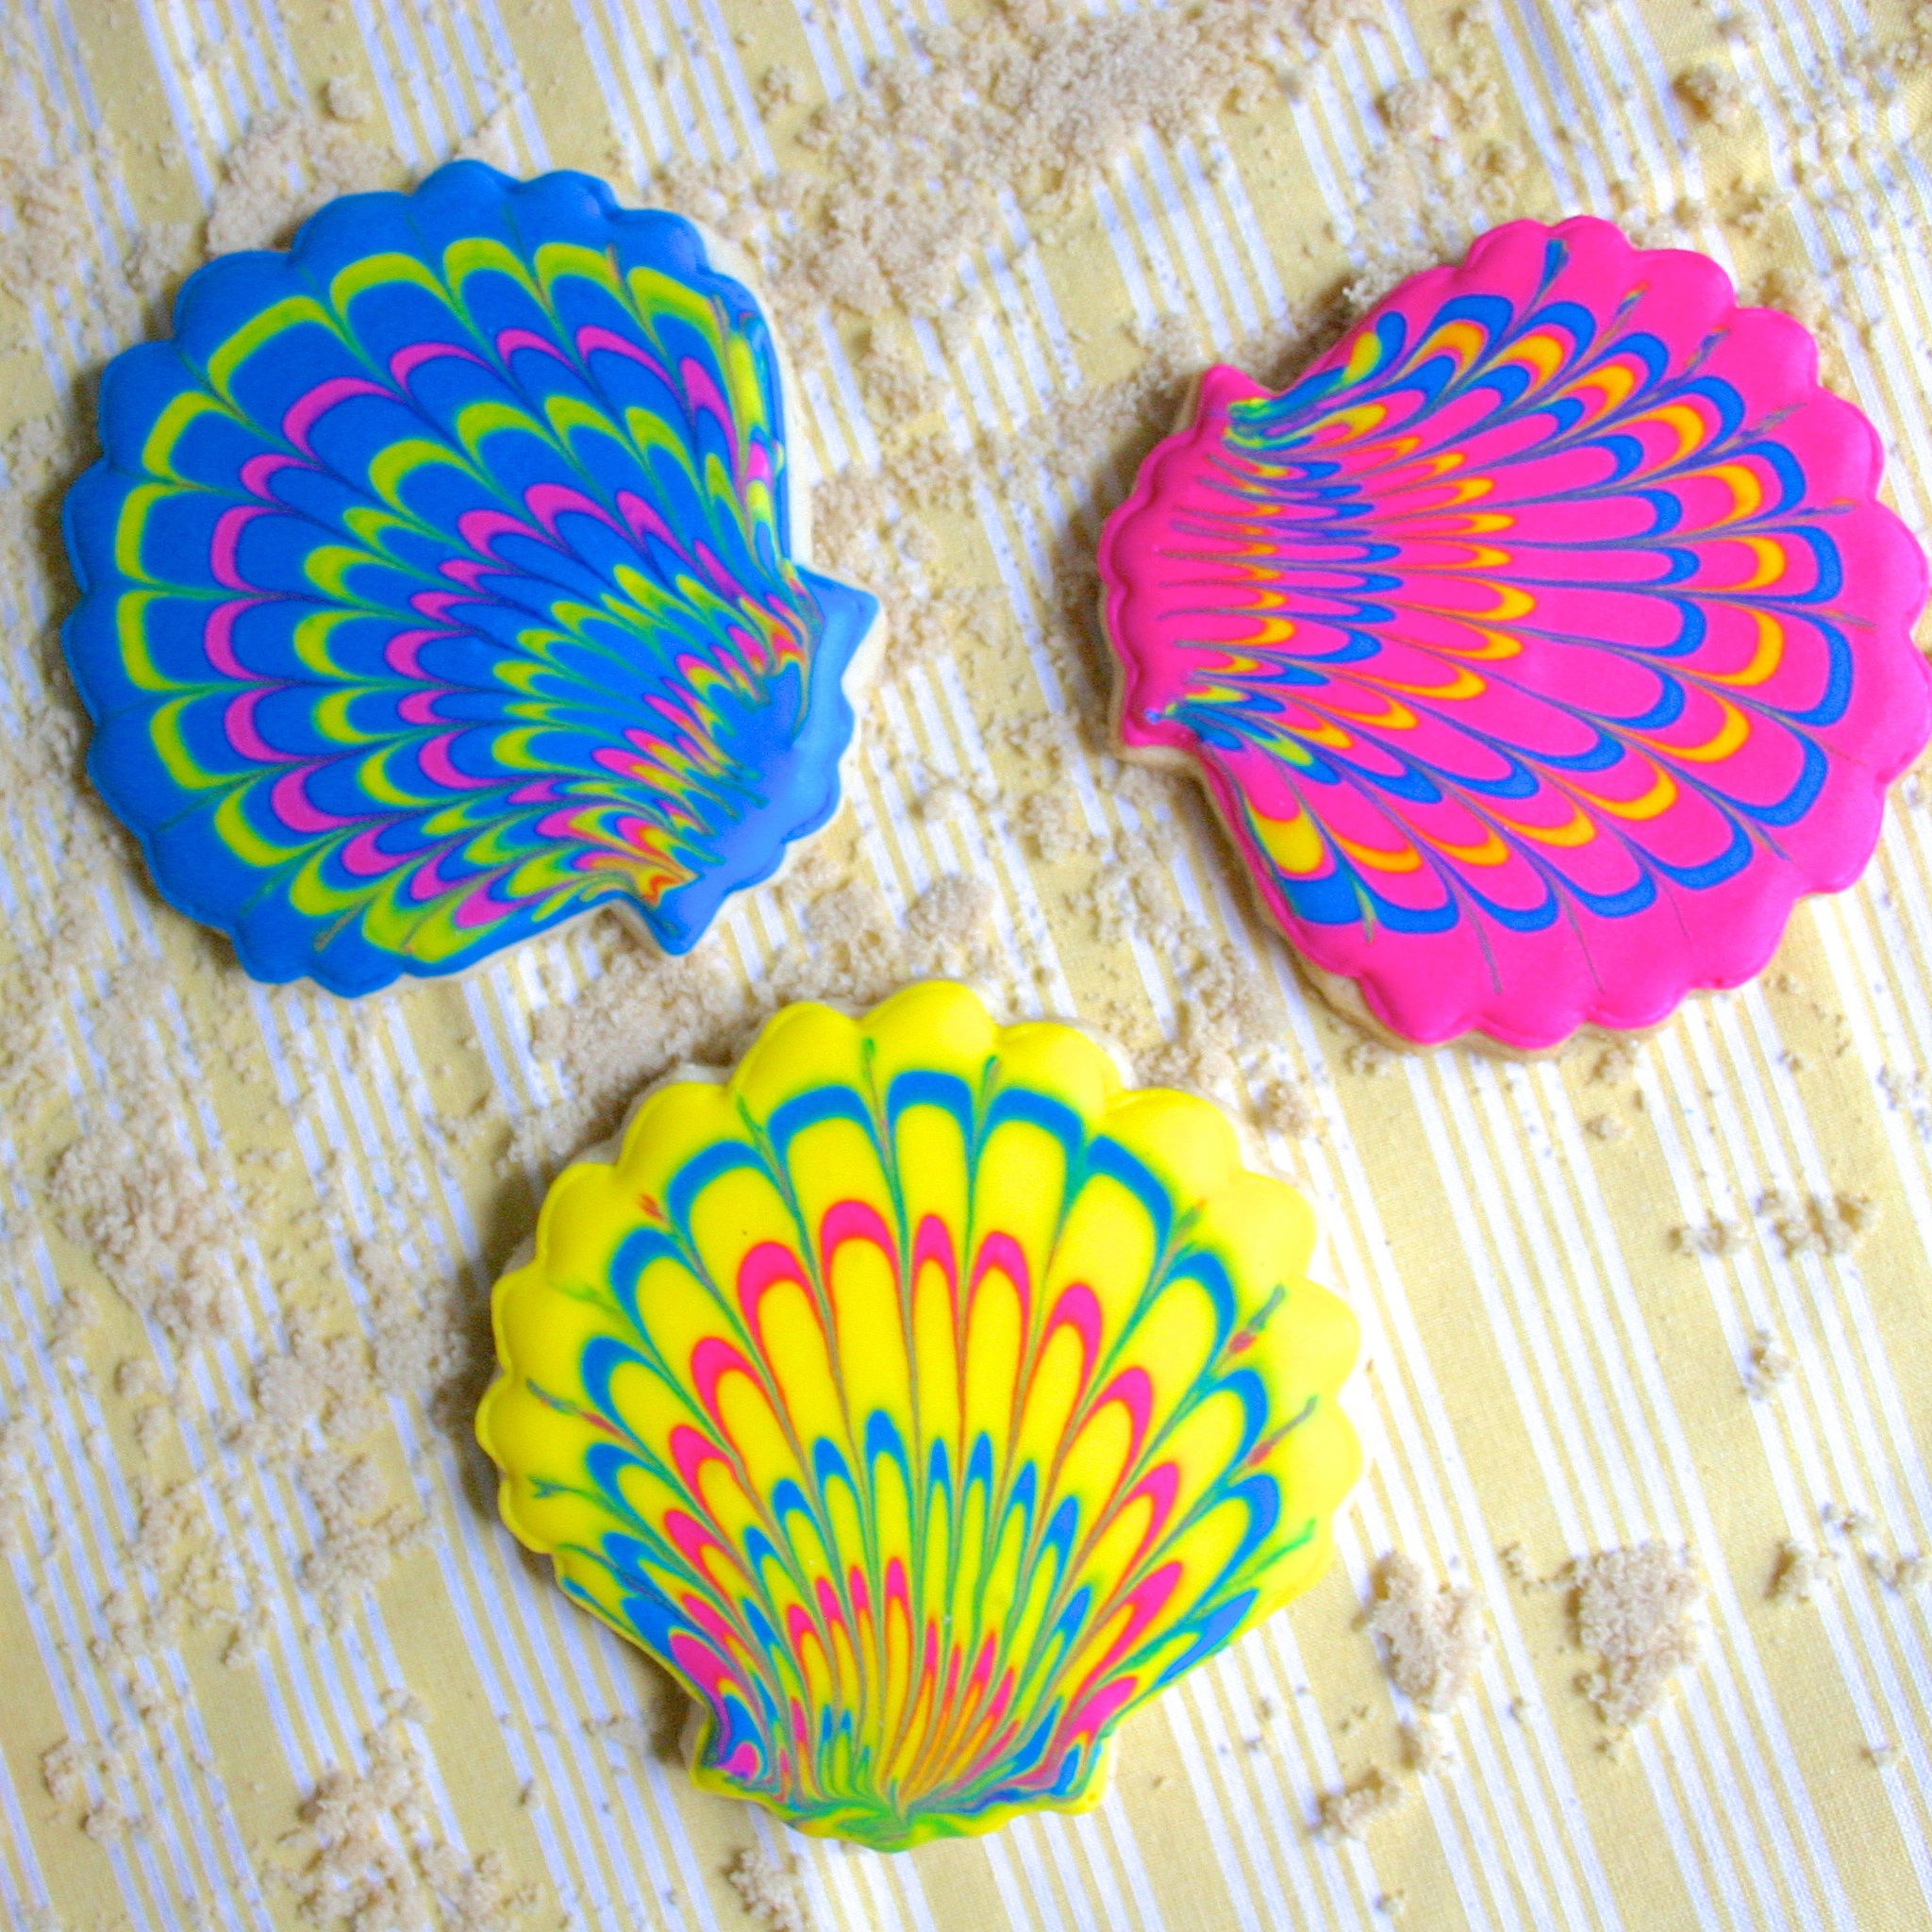
The shells are arguably the most "difficult" of this set, but once you get the pulling technique down it is really simple, but looks really impressive! I've done video tutorials on pulling techniques here, but I also did a vine to show the stage.
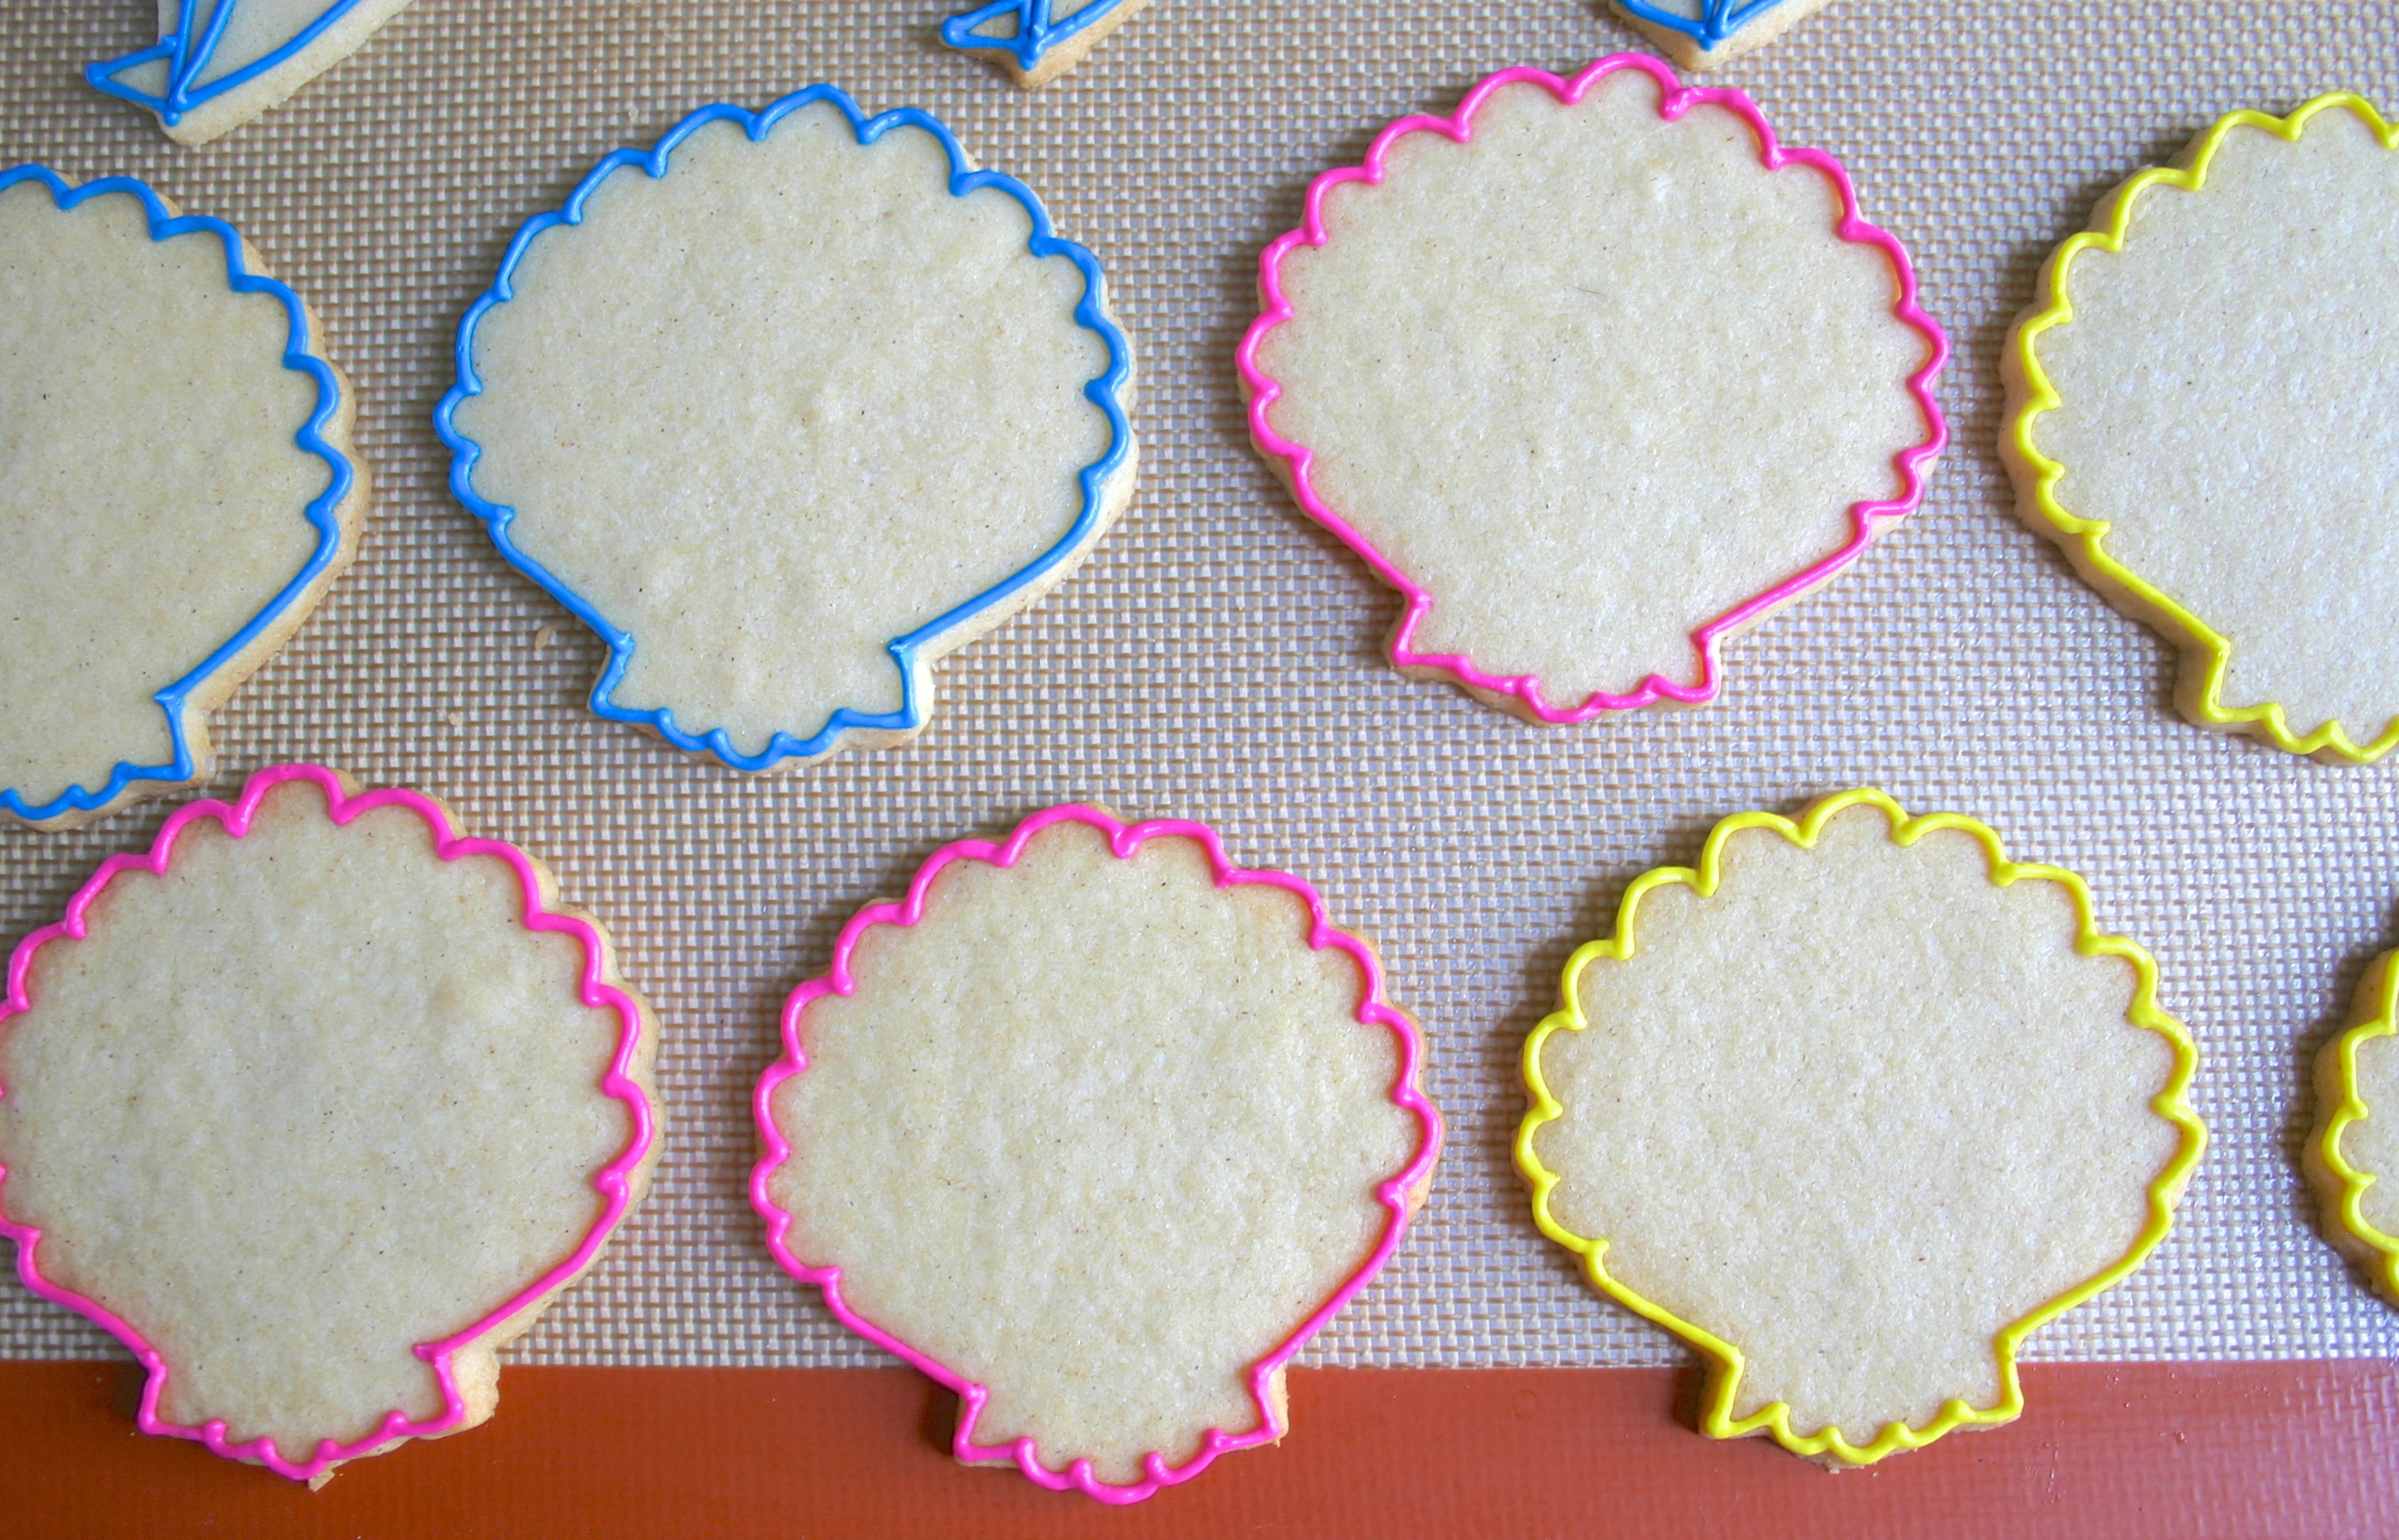
Outline the shells with the thick icing and allow the outline to completely dry. You're going to be using a toothpick to create the ridged look, so you'll be risking hitting the outline quite frequently. If the outline is completely hardened this won't be a problem, if it hasn't set you can break it.
Now this kind of decorating you need to do one cookie at a time. Using the flood icing, fill the shell solid. Then using the thick icing, make arched lines that follow the curve of the shell. Then taking the toothpick, pull lines from the top of the shell to the base. I follow the groves of the cookie cutter.
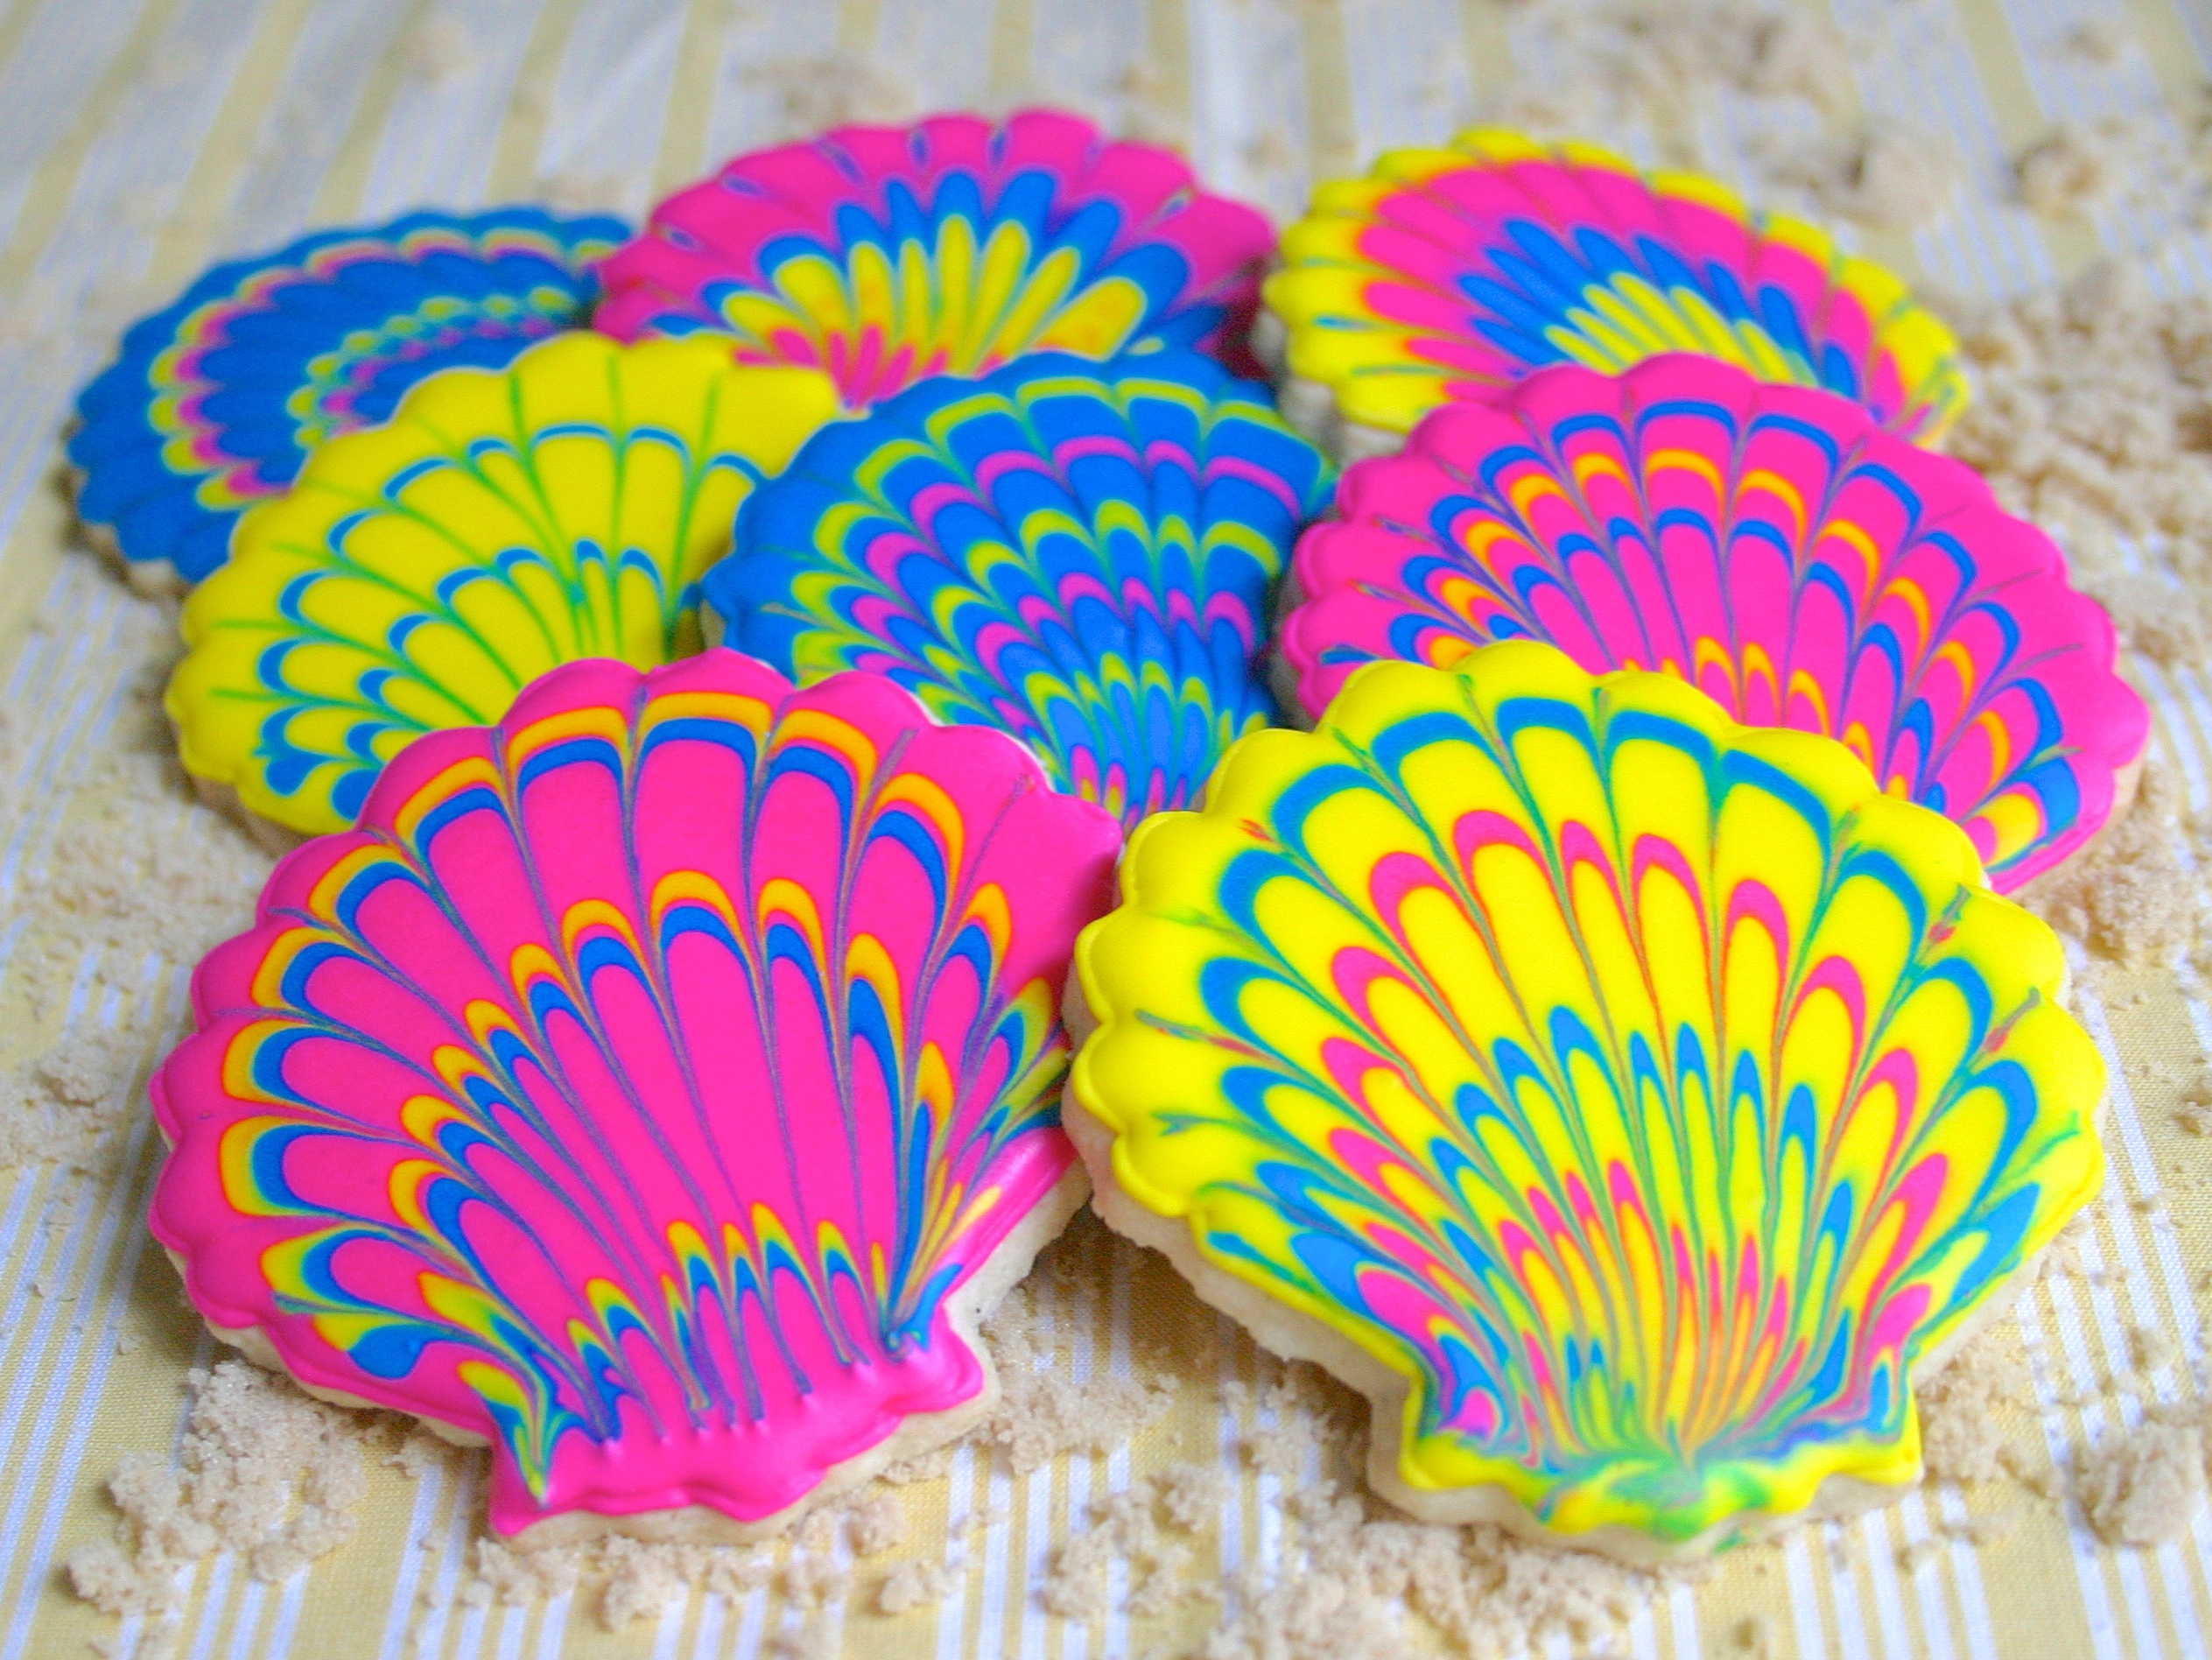 Allow to completely dry and then your summer cookies are complete!!

Cute! I love the cool shapes. It is so creative. My kids would love this! Thanks for the idea and the videos.
ReplyDelete:)
Thanks so much =)!
Delete